Reference12r2:Concept IPVA On Hyper-V
Please visit this Article for generic IPVA Information: Reference14r1:Concept_Innovaphone_Virtual_Appliance
Applies To
This information applies to
- IPVA
- Firmware Version 12r2
- Supported Microsoft Hyper-V versions
Disclaimer: Manufacturers/versions of VM platforms other than those specified here have not been tested, so use at your own risk.
Hyper-V on Windows Client Machines
Create The Virtual Switch
Now a virtual switch of the type external needs to be created. The IPVA's manifest file configures a network adapter that instructs Hyper-V to bind that adapter on a virtual switch named Virtual Switch External. A different networking/switch configuration can be administrated, of course. Here're the steps to create the switch with the expected name from scratch:
- Start Start/Programs/Windows Management Tools/Hyper-V-Manager.
- The Hyper-V Manager Application is going to start up.
- Right-Click Hyper-V-Manager/<Local Machine>/
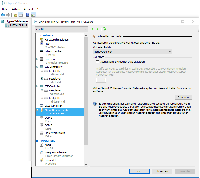
- Select Manager for virtual switches or Virtual Switch Manager...
- Create a new virtual switch via the Create Virtual Switch-button
- Name: Virtual Switch External
- Description or Note: Enter arbitrary text
- Connection Type: Select External Network
- Select a physical adapter from the drop-down list
Networking Implications For The Windows Host
The creation of the Virtual Switch External alters the networking adapter configuration of the windows host.
- The old network adapter Ethernet remains, however its property/network checkmarks will all be disabled, except for Hyper-V Extensible Virtual Switch.
- A completely new network adapter vEthernet (Virtual Switch External) will be created. All previously enabled checkmarks from the Ethernet adapter will also be enabled. The checkmark Hyper-V Extensible Virtual Switch will be disabled.
- The windows host is going to be communicating over the new adapter vEthernet (Virtual Switch External).
- During the configuration changes take effect, a Yes/No-Box is likely to be displayed
Apply Networking Changes
--
Pending changes may disrupt network connectivity.
This computer may lose its network connection while the changes are applied.
This may affect any network operations in progress.
These changes also may overwrite some static changes.
If that happens you must reapply the static changes to restore network connectivity..
Create An IPVA Guest From Scratch
An IPVA guest can be created manually from scratch by means of the 4 *.vhd disk following the given recipe:
- Add a new virtual machine
- Right-Click Hyper-V-Manager/<Local Machine>.
- Select New/Virtual Computer.
- Enter a Name and the storage path for the virtual machine.
- As Generation select Generation 1
- Assign the desired amount of RAM. 256MB is recommended.
- Configure the network. Select the Virtual Switch External created earlier.
- Connect virtual harddisk. Select Connect virtual harddisk later.
- Click Finish
- Remove unneeded components
- Right-Click the newly created entry in the list entitled Virtual Computer.
- Select Settings
- Remove the DVD Drive
- Remove the Network Adapter
- Click Apply
- Connect the harddisks
- Click IDE Controller 0/Add/Harddisk.
- Browse to hd-boot.vhd
- Click IDE Controller 0/Add/Harddisk.
- Browse to hd-cf.vhd
- Click IDE Controller 1/Add/Harddisk.
- Browse to hd-flash.vhd
- Click IDE Controller 1/Add/Harddisk.
- Browse to hd-dump.vhd
- Connect the Network Adapter
- Click Add Hardware
- Select Network Adapter
- As Virtual Switch select Virtual Switch External created earlier.
- Assign the boot medium
- Click BIOS/Boot Sequence
- Move-up IDE to the very front
- Click Ok
Windows Hyper-V Server 2012 R1
We have never tried this ourselves. However, we have received reports to the effect that it worked after adding a legacy network adapter. So you may try it, but you are on your own.
Windows Hyper-V Server 2012 R2 (Core Installation)
This free product lacks a GUI. Instead, Microsoft offers RSAT, the Remote Server Administration Tools. The RSAT do also contain a Hyper-V-Manager, however it practically appeared impossible to prepare a proper versioned client machine, in order to get the RSAT-stack working. The Hyper-V core server comes with a minimal setup console and an administrator command line, targeting the Hyper-V administration by means of Windows powershell commands (Hyper-V CmdLets). This section focusses on this latter administration means.
Sconfig
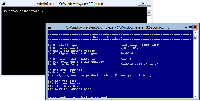
Sconfig addresses the textual menu with the blue background color.
- Option 1): If unsure, the server may simply be left as member in the regular WORKGROUP
- Option 2): Configure the NetBIOS computer name (<NBNAME>).
- Option 4): Enable Remote Management.
- Option 7): Enable Remote Desktop (RDP) for all client versions.
Firewall
There are specific management steps necessary to even allow for RDP. Although not recommended a quick disabling of the firewall avoids warm-up troubles
- To disable the firewall:
- Click into the Administrator command line console.
- Enter powershell and confirm. Enter
netsh advfirewall set allprofiles state off
Remote Desktop(RDP)
Now it is possible to setup a Remote Desktop Session to the Hyper-V server.
- Login as administrator or <NBNAME>\administrator
In order to move files from/to the Hyper-V server
- A network mount of the server's c-drive may be established:
- On the client machine place a command within a command line window
net use * \\<IP of Hyper-V server>\c$ /u:<NBNAME>\administrator
- On the client machine place a command within a command line window
- Or the client machines c-drive may be projected into the RDP-session
- Connection Settings/Options/Local Ressources/Further../Local Drive
Create The Virtual Switch
As above a virtual switch named Virtual Switch External is required and must be bound on a physical network adapter.
- The physical adapters can be listed by means of a regular ipconfig /all
- Create and edit a powershell script named create-switch.ps1
# Create-Switch.ps1:
# Example
# PS C:\vms> .\create-switch.ps1
# Supply values for the following parameters:
# PhysAdapterName: Ethernet 2
# Creating virtual switch 'Virtual Switch External' on physical Adapter Ethernet 2
#
# Name                    SwitchType NetAdapterInterfaceDescription
# ----                    ---------- ------------------------------
# Virtual Switch External External   Intel(R) Ethernet Connection I217-LM

param(
	[Parameter(Mandatory=$true)]
	[string]$PhysAdapterName
)


$VirtualSwitchName = "Virtual Switch External"
echo "Creating virtual switch '$VirtualSwitchName' on physical Adapter $PhysAdapterName";
New-VMSwitch -Name  "$VirtualSwitchName" -NetAdapterName "$PhysAdapterName"
- Invoke the script from within a powershell session by means of .\create-switch.ps1
- The script will ask for the name of the physical network adapter.
- It is assumed the name be Ethernet 2. So, enter
Ethernet 2 - Or invoke the script with
.\create-switch.ps1 -PhysAdapterName "Ethernet 2"
Import An IPVA
It is assumed the downloaded files reside underneath c:\vms as c:\vms\vhd\Virtual Machines, c:\vms\vhd\Virtual Hard Disks.
- Download the IPVA and extract the files.
- Copy the files to the Hyper-V host machine
- Start-up a powershell session. Enter(Note/hint: The Tab-key aides in path completion towards the xml-file)
import-vm -Path 'C:\vms\vhd\Virtual Machines\A09F7653-BBD0-41AE-9A63-53921CE90E26.XML' -register - The output may look like
Name     State CPUUsage(%) MemoryAssigned(M) Uptime   Status
----     ----- ----------- ----------------- ------   ------
IPVA-VHD Off   0           0                 00:00:00 Operating normally
The method above imports the guest machine in-place, i.e. without altering file locations. This method can be applied only once, because a guest's machine id must be kept unique.
- To import and assign a new guest id, the command must be applied slightly different
import-vm -Path 'C:\vms\vhd\Virtual Machines\A09F7653-BBD0-41AE-9A63-53921CE90E26.XML' -GenerateNewId -Copy c:\vms\my-new-guest
- -Copy c:\vms\my-new-guest
- The script imports by copying into a new directory c:\vms\my-new-guest\.
- -GenerateNewId
- The imported IPVA gets assigned a new guest id/guid.
- After that, a new guest named ipva-vhd will be available. To rename towards a new name, the rename-vm command can be placed as such
rename-vm "ipva-vhd" -newname my-new-guest
Create An IPVA Guest From Scratch
An IPVA guest can be created by means of the 4 *.vhd Disk Files. It is assumed the 4 disk files reside as c:\vms\ipva01\hd-boot.vhd, c:\vms\ipva01\hd-cf.vhd,...
- Create and edit a powershell script named create-vm.ps1
# Create-VM.ps1:
# Example: powershell /ExecutionPolicy Unrestricted .\create.vm.ps1 -VMName 'ipva01' -RootDir 'c:\vms'"
# 	will create a vm 'ipva01' in the directory 'c:\vms\ipva01'

param(
	[Parameter(Mandatory=$true)]
	[string]$VMName,
	[Parameter(Mandatory=$true)]
	[string]$RootDir
)

echo "Creating $VMName in directory $RootDir";

New-VM -VMName "$VMName" -Generation 1 -MemoryStartupBytes 67108864 -BootDevice IDE -Path "$RootDir/$VMName";
Remove-VMNetworkAdapter -VMName "$VMName"
Add-VMNetworkAdapter -VMName "$VMName" -DynamicMacAddress -SwitchName 'Virtual Switch External';
Remove-VMScsiController -VMName "$VMName" -ControllerNumber 0
Remove-VMDvDDrive -VMName "$VMName" -ControllerNumber 1 -ControllerLocation 0;
Add-VMHardDiskDrive -VMName "$VMName" -ControllerType IDE -ControllerNumber 0 -ControllerLocation 0 -Path "$RootDir/$VMName/hd-boot.vhd";
Add-VMHardDiskDrive -VMName "$VMName" -ControllerType IDE -ControllerNumber 0 -ControllerLocation 1 -Path "$RootDir/$VMName/hd-cf.vhd";
Add-VMHardDiskDrive -VMName "$VMName" -ControllerType IDE -ControllerNumber 1 -ControllerLocation 0 -Path "$RootDir/$VMName/hd-flash.vhd";
Add-VMHardDiskDrive -VMName "$VMName" -ControllerType IDE -ControllerNumber 1 -ControllerLocation 1 -Path "$RootDir/$VMName/hd-dump.vhd";
- Invoke the script by means of
.\create.vm.ps1 -VMName "ipva01" -RootDir "c:\vms"
Starting An IPVA
Within a powershell session
- enter
start-vm ipva01 - or
start-vm -vmname ipva01
Further Hyper-V CmdLet Commands
See [1]. That documentation addresses the latest CmdLets. The set of Hyper-V Server 2012 commands for the powershell 2.0 is smaller and can be listed by
Get-Command -Module Hyper-V
Increase Amount of RAM
Set RAM to 512MB for a guest ipva01
Stop-Vm ipva01
Set-VMMemory -vmname ipva01 -StartupBytes 536870912
Start-Vm ipva01
Mass-Import from a Template IPVA
A pool of IPVAs can be provided, if a powershell script was applied like the one below.
for($i=1; $i -le 50; $i++){
	import-vm -path 'C:\Users\mst\Desktop\vhd-template\Virtual Machines\D9449806-CBE4-41C9-B518-B5840EB75503.XML' -GenerateNewId -Copy ipva-$i
	rename-vm "ipva-vhd" -newname ipva-$i
	start-vm -name ipva-$i
}
- -Copy ipva-$i
- The script imports from a given IPVA and copies into a new directory (/ipva-1, /ipva-2,..).
- -GenerateNewId
- Each imported IPVA gets assigned a new id/guid.
- rename-vm "ipva-vhd" -newname ipva-$i
- Each imported IPVA gets assigned a new name (ipva-1, ipva-2,..) by renaming from the template's name (ipva-vhd).
- start-vm -name ipva-$i
- Each imported IPVA is going to be started
Known Issues
Windows Host Cannot Access IPVA Guest
The IPVA guest machine may not be network-accessible from the host machine executing the hypervisor. In contrast, the guest is accessible from other hosts.
- The cause might be that a 'Legacy Network Adapter'[2] was configured instead of a 'Network Adapter'.
- Ensure a regular 'Network Adapter' provides connectivity
- VMware Player/Workstation interferes
- Ensure the Windows host machine solely runs Hyper-V. Uninstall any VMware Player/Workstation product.
Hyper-V and VMware Cannot Co-Exist
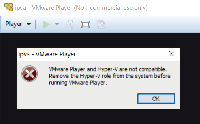
Hyper-V and VMware are mutually exclusive. Either Hyper-V or VMware can be run on a single windows host machine. Do not try to install both hypervisor products. E.g. a VMware Player installation may complain:
VMware Player and Hyper-V are not compatible.
Remove the Hyper-V role from the system before running VMware Player.
IPVA V12r1 and before won't run on Hyper-V
Hyper-V is not supported by IPVA versions v12r1 and before. Consequently, you can't downgrade a running Installation to such a firmware.
No Fault Tolerance on Hyper-V
The Hyper-V solution does not provide software based fault tolerance for hardware, as VMware Fault Tolerance does. However, there are solutions available on the market, that implements fault tolerant server hardware like Stratus or Nec.
Notes
- ↑ Hyper-V Cmdlets: https://technet.microsoft.com/de-de/library/hh848559.aspx
- ↑ Legacy Network Adapter => deutsch: Ältere Netzwerkkarte


