Howto13r2:Step-by-Step Create notifications for a group voicemail
If you have difficulty understanding the written language, we recommend to use www.deepl.com for translation.
If installed, you can also use the translation function of your browser by right-clicking.
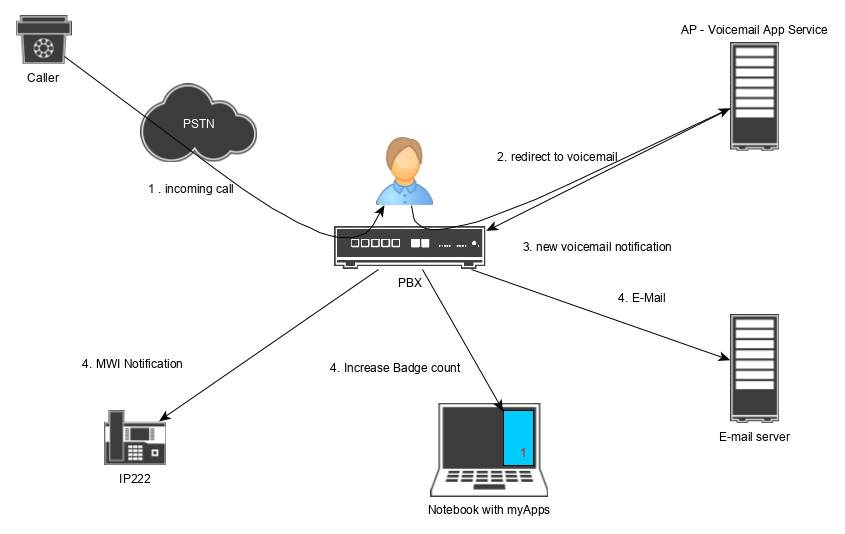
This article explains how to set up a group voicemail. New voicemail notifications should be received via email and badge count information. It also explains an MWI feature key on a desk phone. This feature key flashes as well when a new voicemail is received for that voicemail group.
Purpose
A common requirement is a voicemail box for a group of users. All users of this group should be notified of a new voicemail so no message is missed.
Features
- Notification of a new voicemail by a flashing MWI key
- Notification of a new voicemail via the voicemail apps (myApps) badge count
- Notification of a new voicemail by E-Mail
Limitations
Requirements
- Innovaphone PBX
- Innovaphone myApps client
- A voicemail license is needed for the group voicemail object (no voicemail license for the user is required)
Things to know before you begin
- Name and number of the group voicemail object
- Name (SIPid) of each member of the voicemail group
- Value of the 'Custom'-flag of the voicemail object
Configuration
In this scenario we have the following task to configure:
- User lsv, mro and vgr should receive notifications of new voicemails via a badge count in their voicemail app, via MWI function key and E-mail
- The name of the voicemail group will be group-vm
- The number of the voicemail group will be 89
PBX Manager
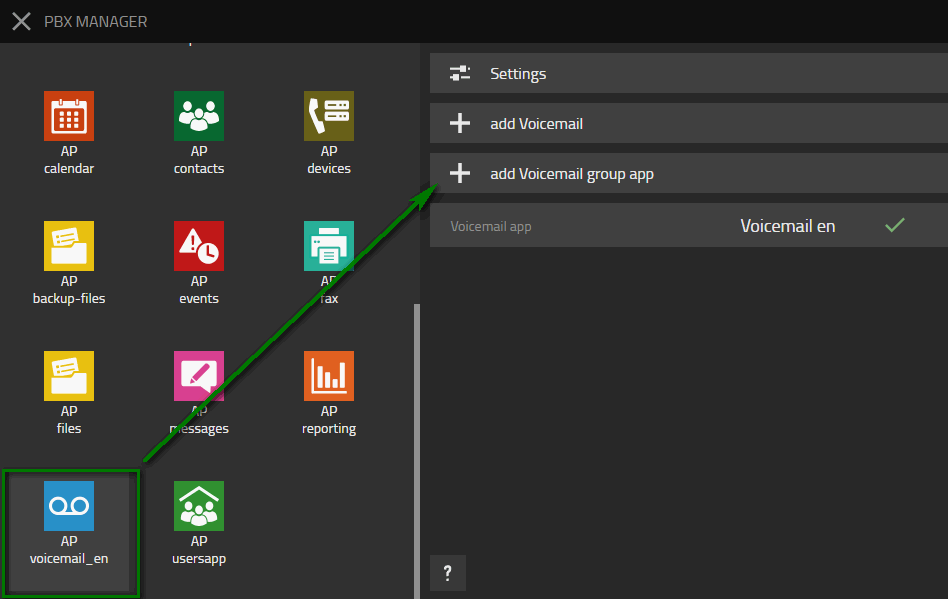
Open your PBX Manager and select your voicemail plugin. Since we want to add a voicemail group we will select a voicemail group app
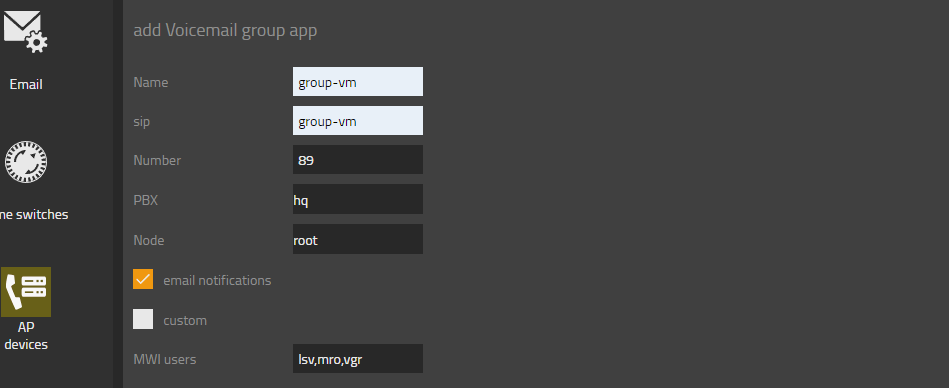
We are going to configure the following options
- Name: The name is the name of the app and displayed to all users in their myApps client. In our case we will call it group-vm
- sip: This name is only used for internal purposes. It is important not to use any space in this name. In our case we will call it group-vm
- Number: Please choose any free number in your dial plan. In our scenario we will configure the 89 because this will be the number of the voicemail group.
- PBX: Select the PBX, the voicemail object should be located at.
- Node: Select the Node of a voicemail object. Please use root in a flat numbering plan.
- email notifications: In case you want to receive the voicemail as e-mail as well, this option has to be enabled.
- custom: Same value as the custom-flag of the voicemail-object.
- MWI users: Please configure the name (SIPid) of every user of this voicemail group. Users should be separated by a comma.
Afterwards press OK.
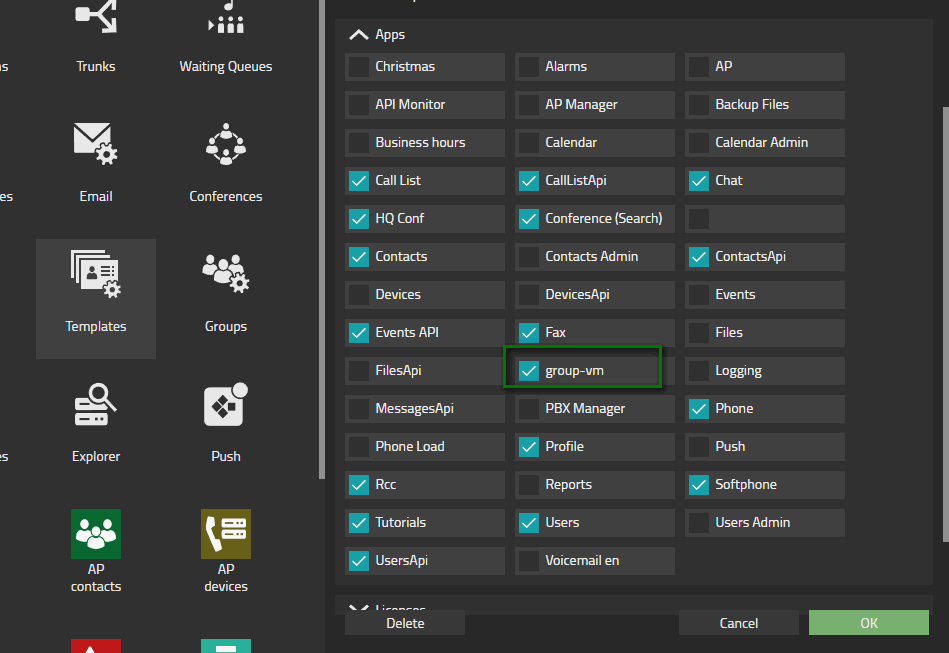
Every user of the group should have the voicemail app. Please use a config template to assign the app to every user of the group.
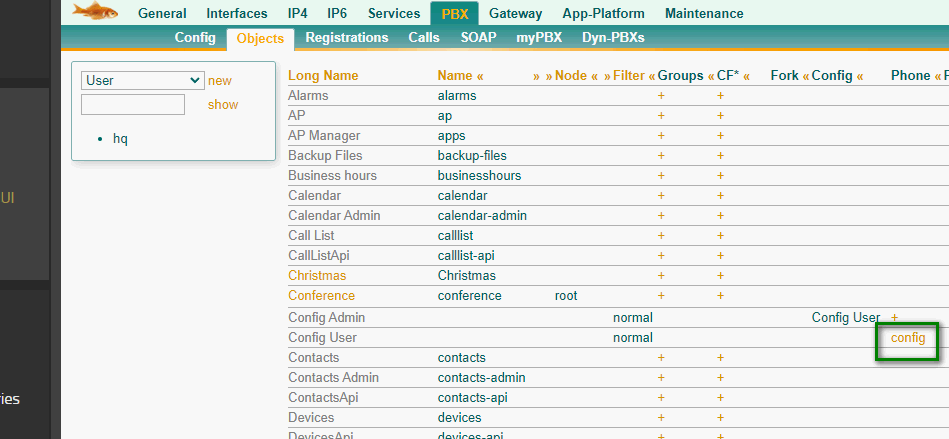
Please go to the advanced UI of your PBX and go to PBX/Objects and click show. Now search for the same config Template you just used to assign the app but this time open the phone config of this template.
Select Function-Keys on the left bar. To create a function we have to select a position on the phone. If we choose 1, the first position on the top left is used for this function key. As Type for the key we will select Message Waiting. Then we click on Add.
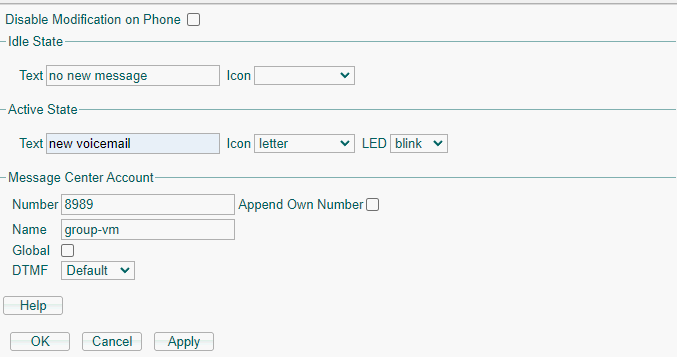
- We can specify an idle text and an active text, which will be displayed in their respective states.
- As number we will configure the number of the group voicemail twice. In our case the group voicemail has the number 89, so we will configure 8989. Do not set Append Own Number.
- We have to set the name to the name of our group voicemail which is group-vm in our case.
To receive mails as well we need to edit the group voicemail object in the advanced UI.
This means we have to search for the object group-vm and edit the object's email settings.
If you only check the box next to the email text, the email address of this object will consist of the name(sipID) of the group voicemail as the user part and the system name as the domain part.
Of course you can also configure an arbitrary E-mail address in the text field next to it.
We recommend to configure a E-mail address of a distribution group.
Do not remove the Voicemail-license checkmark which is mandatory and set by PBXManager plugin!
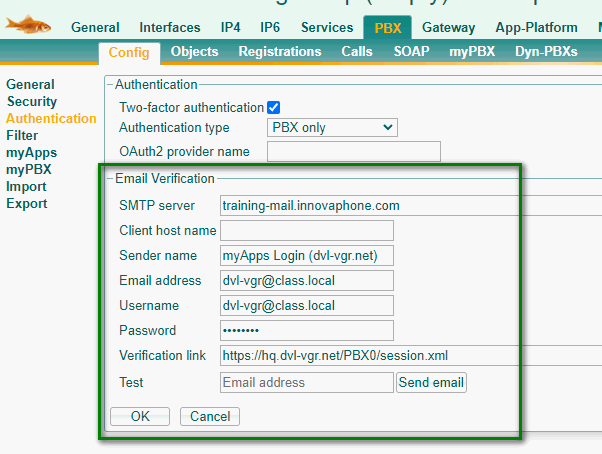
In most cases, the last step can be skipped, since you probably already set up an SMTP connection to your mail server during the Install. If you are not sure whether you have done that, please go to PBX/Configuration/Authentication in your advanced UI and configure the following parameters.
- SMTP Server: The IP address or DNS Name of the SMTP Server
- Sender name: This name is used as sender name of the E-mails
- Email address: The email address for sending mails
- Username: The username of the email account to authenticate at the mail server
- Password: The password of the email account to authenticate at the mail server
Verification
Create a call forwarding on one of your users to 8989 and call this user. Due to the call forwarding the call will be redirected to the group voice box. The Badge count of your group voicemail will increase, all users will receive an E-Mail and the MWI key on all phones will be blinking.
Known issues
- Do not configure a space in the SIPid of the group voicemail.
- A UC-license can not be applied to a group voicemail object. A single voicemail license is needed. This was fixed in 13r3sr10.
