Reference7:Certificate management
Jump to navigation
Jump to search
There are also other versions of this article available:
Howto | Reference7 (this version) | Reference9 | Reference10 | Reference11r1
Supported certificates
File formats
- DER (Distinguished Encoding Rules, Extensions .crt .cer .der)
- PEM (Personal E-Mail, Extension .pem)
Certificate types
- X.509 versions 1-3
Certificate extensions
- basicConstraints
- keyUsage
- extKeyUsage
- subjectAltName
Note: Validation will fail, if an unsupported extension is marked as critical.
Signing algorithms
- sha1WithRSAEncryption
- md5WithRSAEncryption (only decoding)
Trust list
This list contains the certificates that should be trusted by the device for TLS connections.
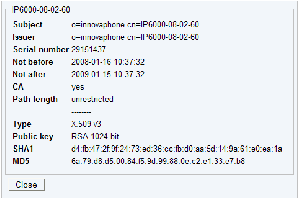
Certificate details
Click the subject name to view the details.
Installing a certificate from a file
- Select a file.
- Press the "Upload" button.
- Take a look at the certificate details and check wheather the SHA1 and MD5 fingerprints match with the values published by the owner.
Installing a certificate that was rejected before
See section "Rejected certificates".
Removing certificates from the trust list
- Select the items to remove using the checkboxes and press the "Remove" button.
- Open TLS connections that are using these certificates will not be closed.
Download
You can download an individual certificate from the trust list in PEM and DER format by clicking the corresponding link. Additionally you can download the complete list as a text file containing the PEM encoded certificates.
Rejected certificates
This list contains the last 10 certificates that were rejected.
Certificate details
Click the subject name to view the details.
Clearing the list
- Press the "Clear" button.
Adding rejected certificates to the trust list
- Check the certificate details and decide wheather it should be trusted or not.
- Select certificates using the checkboxes and press the "Trust" button.
Note: Certificates can only be trusted if they are valid (i.e. not expired).
Fast trust list setup in small installations
- Set up your devices without taking care for the trust list
- Clear the list of rejected certificates
- Make a test run (Shouldn't work!)
- Trust the rejected certificates
- Make a test run again (Should work this time!)
Root certification authority on Compact Flash card
This is the recommended approach to securely deloying PKI to innovaphone gateways.
- The private key of the CA is never being sent over the network or stored on a device.
- You only have to add a single certificate to the trust list of your devices.
Setting up the Root CA
- Insert an empty CF card into the card slot of a gateway.
- Click the "Root CA" link.
- Specify the desired bit strength, validity and distinguished name for the certificate and click the "Create" button.
- Wait until the private key and the certificate have been created. Don't remove the CF card.
- Check the certificate details.
- Remove the CF card and keep it at a safe place or continue with creating a device certificate.
Creating device certificates
- Insert the CF card into the card slot of a gateway.
- Click the "Root CA" link.
- Most probably you want to add the root CA certificate to the trust list of the device. Click the "Trust" button.
- Specify the desired bit strength, validity and distinguished name for the certificate.
- Select "Backup on CF card", if you want to store the newly created private key and certificate on the CF card.
- Click the "Create" button.
- Wait until the private key and the certificate have been created. Don't remove the CF card.
- Check the certificate details.
- Remove the CF card and keep it at a safe place.

