Reference:My Innovaphone: Difference between revisions
| Line 16: | Line 16: | ||
==Projects== | ==Projects== | ||
After creation of an own company, you will have a default project named "DEFAULT". You can rename this project later. | After creation of an own company, you will have a default project named "DEFAULT". You can rename this project later. | ||
You can also create more projects on the projects page with "Create new project". | You can also create more projects on the projects page with "Create new project". | ||
Each project of a company must have a unique name. | Each project of a company must have a unique name. | ||
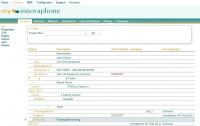
[[Image:overview.jpg|center|thumb|200px|overview page]] | |||
If you follow the link of one project name, you can do these things: | If you follow the link of one project name, you can do these things: | ||
Revision as of 16:17, 28 May 2009
About
My innovaphone replaces the former license manager. It will also include the handling of device warranty and software service agreements (only partially implemented yet).
Project-View
My innovaphone offers the possibility for several users to be in one company. This company shares its balance of licenses over all users and can have several projects. Projects have their own balance of license types and devices are bound to a project.
Language
My innovaphone will support multiple languages. You can select your desired language at the bottom of the page, although only english is fully available yet.
First steps
Open my.innovaphone.com and click the "Register Now" link. Enter your personal data and register. You will receive a registration email with an activation link. After account activation you will have to decide wether to create a new own company or to ask another user to take you into his company. This is very important as you can't leave a company.
Projects
After creation of an own company, you will have a default project named "DEFAULT". You can rename this project later. You can also create more projects on the projects page with "Create new project". Each project of a company must have a unique name.
If you follow the link of one project name, you can do these things:
- Update Project: rename the project or/and change its description.
- Edit User Rights: Here you can edit user rights. You can add users (email) to have access to the selected project. These users will then see this project in their foreign project list.
You can also remove the rights of a user.
- Delete Project: delete the project. Only possible if it has no activation keys, devices or user rights.
- Import Data: By pressing this button, you will have to enter your old account login. Afterwards you will get a list of your balance and of all your devices with their licenses.
The shown balance is the balance of all users, which belong to your old group (if you belong to a group). You can now select all devices which you want to import to the currently selected project. There might be errors, if you try to add a device. They are explained here.
By confirming this import, all users of your group will be locked in the old license manager.
You can now import further devices to another project, if you want.
Note: importing of your old balance and devices might take a while!
Foreign Projects
Instead a adding a user to a company, you can grant a user access to one of your projects. This user will then be able to maintain the licenses and devices of this project. But he won't be able to delete/edit a project or to create activation keys with the projects balance.
Balance
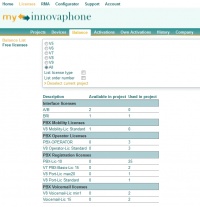
On the balance page you will see the balance of the currently selected project or the balance of all your projects. The balance is bound to your company and not to your user account. The balance is also shared by all projects.
Activations
To increase your projects balance, select one of your projects and enter the activation key in the corresponding field. You can also enter an optional comment for this key. You will then get a listing of all contained licenses. After commiting this key, your project balance will have been increased by the keys values.
Created Activations
You can create activation keys on the project page for other users or to simple transfer licenses from one project to another. You will see these created activation keys by following the "View created activation keys" link.
Devices
Adding new devices
Press the Button 'Add' on the Devices page.
- You can add a single new device
- You can add devices according to a mac address range (e.g. from 00-90-33-08-20-00 to 00-90-33-08-22-00), maximum 50 at once
- You can add devices by uploading a text file with mac addresses like this (maximum 50 at once):
00-90-33-08-20-20 00-90-33-08-20-21 00-90-33-08-20-22 00-90-33-24-20-20
- You can add devices according to your received order number. Just enter you order number and you will get a list of all devices bount to this number.
Note: MAC addresses can be always given like this:
- 00-90-33-xx-xx-xx
- 00:90:33:xx:xx:xx
- 009033xxxxxx
- xxxxxx (00-90-33- will then be added automatically)
There might be errors, if you try to add a device. They are explained here.
Methods for one Device
Add new licenses
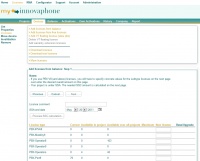
To create new licenses for a device, you have to add this device first on the devices page and then select a version of the license (V8 is not yet supported, use V7 licenses instead) and click "Create new license". On the next page you will see a list of all available license types, which depends on your current available license types, of the selected license version and the device type (IP6000, IP800 e.g.):
You see the available project balance, the balance over all projects (excluding foreign projects), the currently installed licenses and the maximum amount for this device type. You can now enter the value of the new license. Base/Upgrade licenses can be selected via dropdown box. Voicemail and Standby lics must always have the same amount as the selected PBX-PBX... license! The maximum amount of PBX-Registration licenses equals the amount of the selected PBX-PBX... license!
Now confirm your new selection. If you have not enough licenses in your current project, but there are still licenses in other projects, you will get a dropdown box with a list of all projects containing the needed licenses. Select all desired/needed projects and confirm your selection again. The balance of all selected projects will then be decreased by the needed amount.
Add floating license
Here you can add a floating license for a slave pbx.
Downloading licenses
If you want to download licenses for a device, you have to decide wether to download the licenses encrypted or not. If you download the licenses unencrypted, you won't be able to return those licenses anymore. So you won't be able to return licenses for devices with V5-V7 licenses, as licenses for this versions are not encrypted. Encrypted licenses are stored in a xml file, which you can then upload on your V8 (or higher) device.
You can also download test licenses if you want to run tests. You will be asked whether the device is used as slave and if not, how many pbx licenses you want to use. Downloading unencrypted test licenses won't lock your return license option.
You can now also download licenses directly from by the web interface of a device. You just have to enter your account data and start downloading the licenses from my.innovaphone.com wihtout having to download/upload a license file.
Returning licenses
You can return V8 (or higher) licenses by uploading the xml file, you got from your device or by returning your licenses over the web interface of your device (General->License).
Request certificate
If you have the needed rights, you can request a new device certificate for your device.
Change license and device comment
You can always change the comments for a device or the changeable license comment.
Delete
You can always delete devices. If they have licenses, these won't be deleted.
Telephone devices
As the device warranty will be handled by licenses now, you can also add telephone devices to your projects.
History
You can view your history for several contexts:
- Company: history of all actions in your company
- User: history of all actions of the selected user
- Device: history of all actions for the selected device
Each context applies to the currently selected project. If you haven't selected a certain project, you will see the history over all projects.
You can select to view the history of the last day, week, month, year or from always. Collecting data might take a while...
Warranty
On the overview page you can "Check device warranty" of a device, which not belongs to your company. Simply enter the MAC or IPEI.
Account settings
Here you can change your personal data, password and here you can also add other users to your company.
Image explanation
Errors
Already In Company
- This device already exists in your company and can't be added/imported.
If you want to import this device anyway, you first have to delete your current device from its project.
Already Imported
- This device has been already imported.
You can't import it again.
Not Found
- This device was not found in the my innovaphone database.
This should never happen, but if, contact the adminitrator.
Warnings
Several Companies
File:Icons several companies.gif
- This device is already in another company.
This means, that either you do not have the physical device or it once belonged another company. You can still import/add this device and you will have access to all of its current licenses.
Several Users
- This device has licenses from several users of the old license manager.
This means, that you are not neccessarily the user, who physically owns this device. If you do not own it, do not import it.


