Howto:WakeUp App - Installation and Configuration
Applies To
This information applies to:
- innovaphone PBX 14r1 and later.
- WakeUp package build 1037 RLS, built with the 15r1 SDK/runtime.
The documented test system uses PBX 16r1.
Overview
WakeUp brings wake-up calls to myApps and IP phones with a simple, multilingual experience. Schedule multiple wake-ups, choose your preferred sound and adjust your settings in just a few steps.
For Hotels and Teams, WakeUp Moderator makes it easy to find users and manage their wake-ups from one place, while WakeUp Admin keeps service status and sound options under central control. Everything stays synchronized through the PBX, and scheduled calls work even when the app is closed.
-
 Wake-up calls made simple
 -
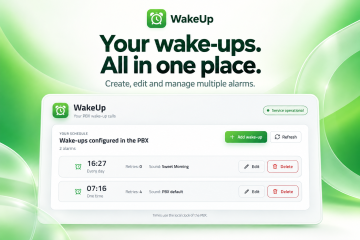 Your wake-ups in one place
 -
 Get started in a few steps
 -
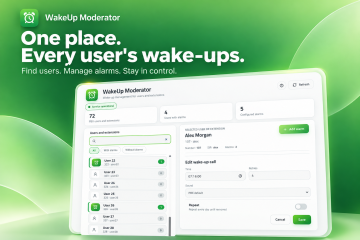 Manage wake-ups for users and extensions


More Information
Problem Details
WakeUp manages wake-up calls from myApps or an IP phone. All interfaces use the same wake-ups stored in the PBX. The PBX calls the user at the configured time, even when the user app is closed.
| App | Purpose |
|---|---|
| WakeUp | Create, edit and delete your own wake-ups. |
| WakeUp Admin | Check service status and configure the available alarm sounds. |
| WakeUp Moderator | Search for users or extensions and manage their wake-ups. |
Telephone access uses a Voicemail object with an XML menu. The XML and voice prompts are stored in the Files App.
System Requirements
- An operational innovaphone PBX, Application Platform and Files App.
- Administrator access to the Application Platform, Settings and PBX Admin UI.
- A WakeUp package matching the platform architecture:
x86_64,arm64orarm. - A free internal number for the Voicemail menu.
- HTTPS connectivity and trusted certificates between the PBX and Application Platform.
Download
Download WakeUp installation package (1037 RLS)
Download and extract the ZIP before installation. It contains the application files for the available platform architectures, the five telephone language folders, optional alarm sounds and documentation. Keep its folder structure unchanged.
Installation
Follow these steps in order.
Examples use host apps.example.com, PBX domain customer.example.com and instance names wakeup and files. Replace them with your system's values.
1. Install the WakeUp service
These instructions use the supplied release package; App Store availability is not required.
- Open the Application Platform Manager enable developer mode and choose the App upload button near the Appstore.
- Enter App ID
wakeupand title WakeUp. The App ID is alwayswakeupin lowercase. - Leave Disable verification of app ID unchecked.
- From the package folder matching your platform architecture, upload
innovaphone-wakeupandinnovaphone-wakeup.png. Do not rename the files. - Open the installed service and add an instance:
| Field | Value |
|---|---|
| Name | wakeup, or your chosen instance name
|
| Domain | Your PBX domain |
| Password | A strong, unique password |
| Webserver path | Normally customer.example.com/wakeup
|
| Database settings | Keep the platform-generated values |
- Save, start the instance and note its generated App URL.


2. Add the apps in Settings
- Close and reopen Settings to refresh the plugins.
- Open Settings → WakeUp and select Add an App.
- Create WakeUp first. Enter a display name, a unique SIP name and the user templates that should receive it.
- Create WakeUp Admin for technical administrators.
- Create WakeUp Moderator for trusted users who may manage other users' wake-ups.
- Open WakeUp Admin and confirm that a PBX connection is shown.
The Settings plugin configures the App Objects and their required access. The primary WakeUp object provides the PBX connection, so create it even if you mainly use Moderator.
Only assign Admin and Moderator to the appropriate users or templates.


XML Voicemail Configuration
3. Choose the telephone language
Choose the language before uploading the files and configuring the Voicemail URL.
| Spoken language | Folder in the package |
|---|---|
| English | files-app/wakeup-en
|
| Italian | files-app/wakeup-it
|
| German | files-app/wakeup-de
|
| French | files-app/wakeup-fr
|
| Spanish | files-app/wakeup-es
|
The XML flow is the same; the audio files provide the selected language. The graphical apps follow the myApps language independently.
The following steps use Italian. For another language, replace wakeup-it with the matching folder name.
4. Upload the files and edit config.xml
- In the Files App, prepare an account/share that the PBX can use to read the files. Keep its username and password for the next step.
- Using WebDAV, copy the complete
wakeup-enfolder from the package intoroot. - Check the layout:
root/
└── wakeup-it/
    ├── config.xml
    ├── wakeup.xml
    ├── audio-test.xml
    └── audio/
        └── ... .g711a voice files
- Open
config.xmlin a text editor. FindINSTALLATION SETTINGand replace only the URL on this line:
<assign out="$api-base" value="https://apps.example.com/customer.example.com/wakeup/wakeup-ivr"/>
- Use your WakeUp instance's webserver address followed by
/wakeup-ivr, then save the file back to Files.
Do not edit wakeup.xml. Keep config.xml next to it. Do not add a trailing slash, password, token or query parameters to the API URL. Preserve filenames and the lowercase audio folder.

Italian telephone package in Files

WakeUp API address in config.xml
5. Configure the Voicemail number
- In the PBX configuration, create an object of type Voicemail.
- Configure:
| Setting | Value |
|---|---|
| Long Name | WakeUp Voicemail
|
| Name | A unique SIP name, for example wakeup-voicemail
|
| Number | A free internal number chosen for this installation |
| Node / PBX | The PBX serving the users |
| Max Calls | The required simultaneous menu calls, within PBX capacity |
| User / Password | The Files credentials from step 4 |
- Set the Script URL, replacing the example host, domain and Files instance:
https://apps.example.com/customer.example.com/files/root/wakeup-it/wakeup.xml?$_pbxcoder=g711a
- Save and call the assigned number from a known PBX extension. You should hear the welcome message and menu.
The Files credentials are not the WakeUp instance password. No HTTP Client authentication entry is needed for the WakeUp API. Do not add $_wakeup_api or credentials to the Script URL.

Voicemail General settings

Voicemail script and Files access
To change the spoken language later: upload the other complete language folder, set its config.xml to the same API URL, and change the folder name in the Script URL. For separate access numbers in several languages, create one Voicemail object per language.
Alarm Sounds (Optional)
Without extra configuration, WakeUp uses the PBX default MOH. To offer other sounds, create a PBX Waiting Queue for each sound and publish it from WakeUp Admin.
Configure a Waiting Queue
- Upload the audio to Files or another WebDAV location accessible to the PBX. Optional samples are included in
files-app/Alarm/audio. - Create a Waiting Queue with a unique SIP name, for example
alarm-gentle. - Configure the audio URL in both announcement fields and enable repeating playback so the sound continues during the wake-up call.
- Save and test the queue directly before adding it to WakeUp.
For a supplied G.711 A-law sample in Files, use this URL pattern:
https://apps.example.com/customer.example.com/files/root/Alarm/audio/alarm-gentle.$coder?coder=g711a&repeat=true&fileskey=<FILES_KEY>
Replace <FILES_KEY> with your Files share access key. Preserve the uppercase Alarm folder. Treat the key as a credential and hide it in public screenshots.

Waiting Queue announcements
Make the sound available to users
- Open WakeUp Admin → Selectable alarm sources.
- Click Add source and enter a label, the exact Waiting Queue SIP name, and an optional description.
- Select the default source for new wake-ups.
- Click Save alarm sources. WakeUp checks the queue before making it available.
Use the ? button for a short setup reminder. Changing the default or removing a catalog entry does not change existing wake-ups.

WakeUp Admin and alarm sources
Operation
WakeUp
Click Add wake-up, choose the time, sound, retry count and optional daily repetition, then save. Use Edit or Delete to manage an entry. Type the time or adjust it using the clock dial.
Times use the PBX local clock, not the phone or browser time zone. A green service indicator confirms connectivity; test an actual wake-up call before putting the service into use.

WakeUp schedule

WakeUp alarm editor
WakeUp Moderator
Search by name, extension or SIP name. Users with wake-ups are highlighted. Filters show all users, those with wake-ups, or those without. Select a user to create, edit or delete their wake-ups.
The introductory tour explains the controls. It can be hidden and reopened from ?.


WakeUp Moderator editing hours
Call the configured Voicemail number from your extension.
| Key | Action |
|---|---|
1 |
Hear the configured wake-ups |
2 |
Create another wake-up |
3 |
Change a wake-up |
4 |
Delete a wake-up |
9 |
Repeat the menu |
0 |
End the call |
- Enter times as four digits in 24-hour format:
0730means 07:30. No#is needed for the time. - When asked to select a wake-up, enter its announced index followed by
#. Press*to cancel. - After an operation, press
1to return to the menu or0to finish. - New telephone wake-ups are one-time entries with no retries and use the default sound configured in WakeUp Admin. Changing a time preserves the other settings.
Test Before Use
- Create a wake-up a few minutes ahead in WakeUp. Check that Moderator shows the same entry.
- Call the Voicemail menu, listen to the entry, change its time and check the result in the app.
- Create and delete a second entry by telephone. Check that returning to the menu and pressing
0work. - Let a wake-up run: confirm the PBX calls the correct extension and the selected sound is heard.
- Test retries, daily repetition and simultaneous callers if these will be used.
Limit Admin and Moderator access to authorized users. The IVR API has no HTTP authentication: anyone who can reach it may attempt wake-up operations. Restrict the /wakeup-ivr route to the PBX or trusted networks without blocking normal myApps access. Validation alone is not access control.
Known Problems
| Problem | What to check |
|---|---|
| App upload fails | Use App ID wakeup in lowercase and the binary for your platform architecture.
|
| No PBX connection or app login fails | Check the running instance and primary WakeUp App Object. Reopen Settings → WakeUp and check/save the affected object and its access settings. |
| No voice prompts | Check Files credentials, Script URL, complete audio folder and g711a parameter. Temporarily replace wakeup.xml with audio-test.xml in the Script URL to test audio, then restore it.
|
| “Service temporarily unavailable” | Check that config.xml is beside wakeup.xml, its API URL is correct, and WakeUp Admin shows a PBX connection. |
| Opening the API base URL shows 404 | The API base is not a web page. Test through the telephone menu and check the last IVR result in WakeUp Admin. |
| Caller is not recognized | Call with a visible internal number that belongs to a PBX user. |
| A sound source is rejected or silent | Use the exact Waiting Queue SIP name, not its number or label. Test the queue and both announcements directly. |
| Wake-up is saved but no call arrives | Check the PBX clock, user reachability and PBX call trace. |
For telephone diagnostics, temporarily append &$_trace=255 to the Script URL. Record the failed call's time and collect the Voicemail/PBX trace and WakeUp service log. Remove tracing afterwards and redact credentials before sharing logs.
Updating
- Back up the current package, Files content and PBX configuration.
- Update the service with the new binary for your architecture, preserving the instance settings.
- Update the language folder's XML and audio together, but preserve your configured
config.xmlunless the release requires a configuration change. - Reopen the apps, check the build in WakeUp Admin and repeat the test above.