Howto13r3:Configure User Presence Sync by Connector for Microsoft365: Difference between revisions
Jump to navigation
Jump to search
No edit summary |
|||
| Line 40: | Line 40: | ||
[[Image:Overview_Connector_for_Microsoft365.png|thumb|none|600px]] | [[Image:Overview_Connector_for_Microsoft365.png|thumb|none|600px]] | ||
==Configuration in Azure Portal Sync to Teams== | |||
* '''In the Azure Portal of Microsoft you have to add a new app registration''' | |||
* '''In the picture you can see that we have 2 values after that which we can use for the configuration of the app''' | |||
[[Image:Overview_Connector_for_Microsoft365_Sync_to_Teams.png|thumb|none|600px]] | |||
* '''Switch to the authentication in the left'''- | |||
* '''You only have to configure a client secret and save the value for the configuration of the app''' | |||
[[Image:Authentication_Connector_for_Microsoft365_Sync_to_Teams.png|thumb|none|600px]] | |||
* '''Switch to api permissions on the left''' | |||
* '''You have to configure application permission (Presence.ReadWrite.All) as shown in the picture''' | |||
* '''Grant access to the api permissions, if not possible you have to ask an admin''' | |||
[[Image:APIPermission_Connector_for_Microsoft365_Sync_to_Teams.png|thumb|none|600px]] | |||
Revision as of 10:29, 13 December 2022
Applies To
This information applies to V13r3
More Information
This article outlines a configuration scheme for Connector for Microsoft365 functionality.
System Requirements
- admin account in Azure Portal of Microsoft
Configuration in Azure Portal
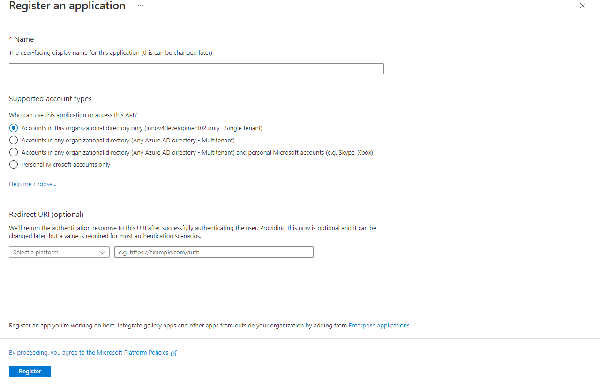
- In the Azure Portal of Microsoft you have to add an app registration
- You only have to give a name for the app
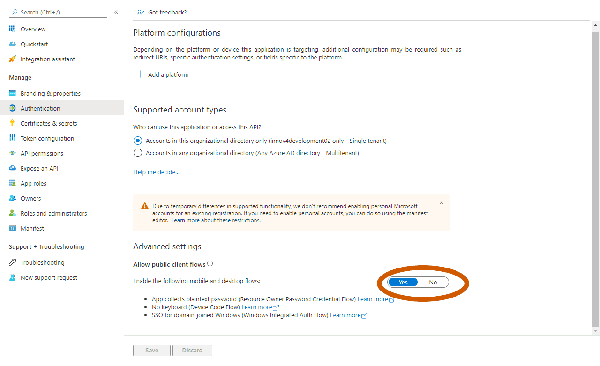
- Switch to the authentication in the left-
- You only have to configure allow public client flow
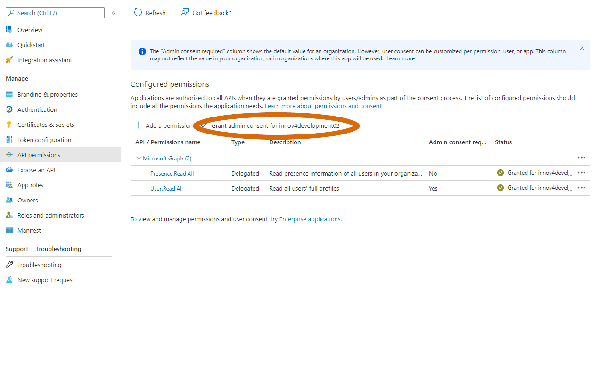
- Switch to api permissions on the left
- You have to configure delegated permissions (User.Read.All and Presence.Read.All) as shown in the picture
- Grant access to the api permissions, if not possible you have to ask an admin
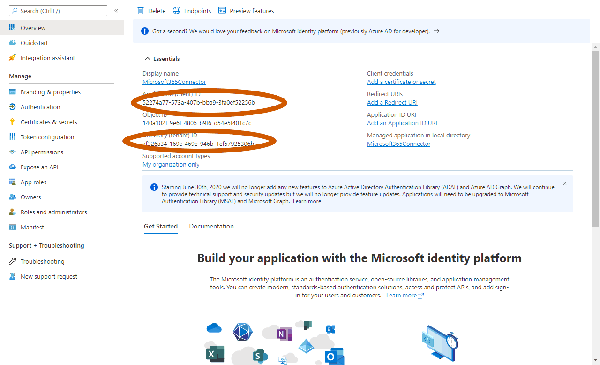
With these configurations you can configure the Connector for Microsoft365
- Client ID as shown in the picture
- Tenant ID as shown in the picture
- User
- Password
Configuration in Azure Portal Sync to Teams
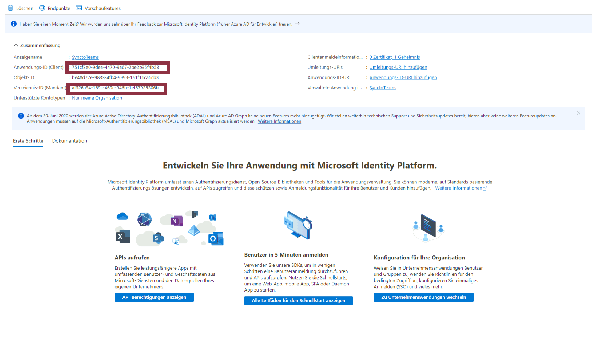
- In the Azure Portal of Microsoft you have to add a new app registration
- In the picture you can see that we have 2 values after that which we can use for the configuration of the app
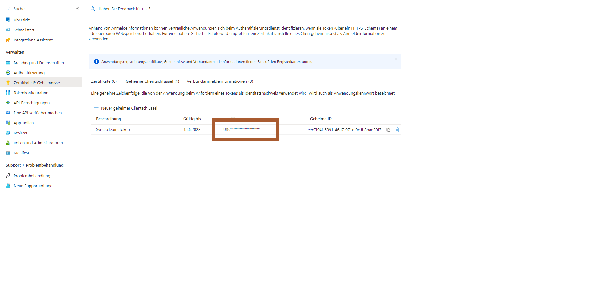
- Switch to the authentication in the left-
- You only have to configure a client secret and save the value for the configuration of the app
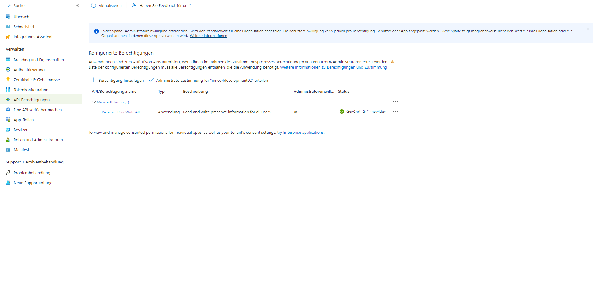
- Switch to api permissions on the left
- You have to configure application permission (Presence.ReadWrite.All) as shown in the picture
- Grant access to the api permissions, if not possible you have to ask an admin
Configuration in PBX Manager
For configuring the app you need the following parameter:
- Name of the master PBX (Not full DNS name, really just only the PBX name)
- Client ID of the registrated app from the azure portal
- Tenant ID of your organization, also from the azure portal
- Credentials for your Microsoft Azure Portal login (User needs a Teams license)
- Notification uri "https://{your_domain}/{your_tenant}/microsoft365/subscriptions"
- After successful configuration and subscription the Microsoft services will connect to the specified notification uri for presence and line state updates.
- For this to work it is important to make sure that the specified notification uri is reachable from the Microsoft services, meaning from the public internet.
- You need to be able to reach your app platform with the specified uri from the public internet.