Howto:Step-by-step faxserver installation: Difference between revisions
Jump to navigation
Jump to search
No edit summary |
|||
| Line 1: | Line 1: | ||
[[Category:Howto|{{PAGENAME}}]] | [[Category:Howto|{{PAGENAME}}]] | ||
<!-- Keywords: step-by-step step by step faxserver fax server installation Linux application platform LAP V10 OpenOffice --> | <!-- Keywords: step-by-step step by step faxserver fax server installation Linux application platform LAP V10 OpenOffice --> | ||
This documents explains a step-by-step installation of the [[Reference10:Concept_Faxserver | | This documents explains a step-by-step installation and configuration of the [[Reference10:Concept_Faxserver | innovaphone fax]] solution. | ||
== Applies To == | == Applies To == | ||
This information applies to the innovaphone firmware V10 final and | This information applies to the innovaphone firmware V10 final and Linux application [[Reference10:Concept_Faxserver | innovaphone Fax]] V10 final. | ||
== Installation == | == Installation == | ||
* If the innovaphone Linux Application Platform is not yet running, install it with this [[Reference10:Concept_Linux_Application_Platform | instructions]]. | * If the innovaphone Linux Application Platform is not yet running, install it with this [[Reference10:Concept_Linux_Application_Platform | instructions]]. | ||
* Download the latest | * Download the latest [http://download.innovaphone.com/ innovaphone Fax application file] and upload it to the innovaphone Linux Application Platform: | ||
[[Image:faxserver_upload_application.png]] | [[Image:faxserver_upload_application.png]] | ||
| Line 18: | Line 18: | ||
* Add the registration in the Gateway FAX interface to the PBX Gateway object with the enabled T.38 option: | * Add the registration in the Gateway FAX interface to the PBX Gateway object with the enabled T.38 option: | ||
[[Image:faxserver_interface.png]] | [[Image:faxserver_interface.png]] | ||
* Add the HTTP login credentials for the | * Add the HTTP login credentials for the fax server Webdav folder at the HTTP client: | ||
[[Image:faxserver_webdav.png]] | [[Image:faxserver_webdav.png]] | ||
* Configure at least one email address for each user: | * Configure at least one email address for each user: | ||
| Line 24: | Line 24: | ||
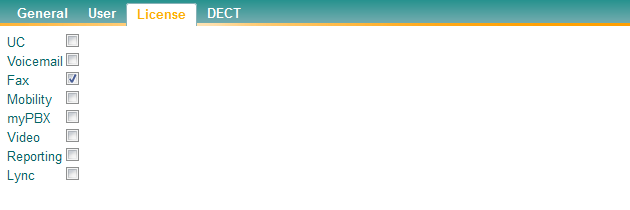
* And enable the fax license for each user which is allowed to send or receive fax documents: | * And enable the fax license for each user which is allowed to send or receive fax documents: | ||
[[Image:faxserver_pbx_license.png]] | [[Image:faxserver_pbx_license.png]] | ||
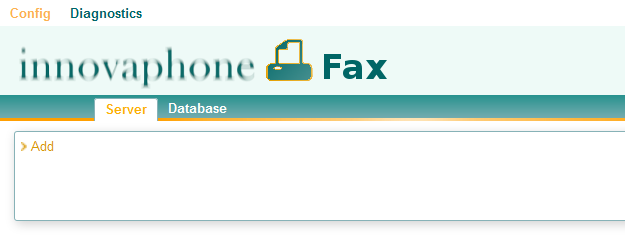
* Add a new | * Add a new fax server configuration at the Fax application page with the add link: | ||
[[Image:faxserver_add.png]] | [[Image:faxserver_add.png]] | ||
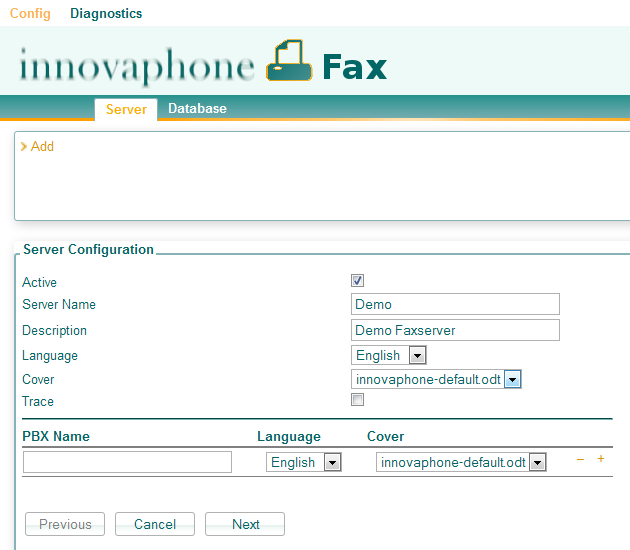
* Enter the server specific issues: | * Enter the server specific issues: | ||
[[Image:faxserver_add_server.png]] | [[Image:faxserver_add_server.png]] | ||
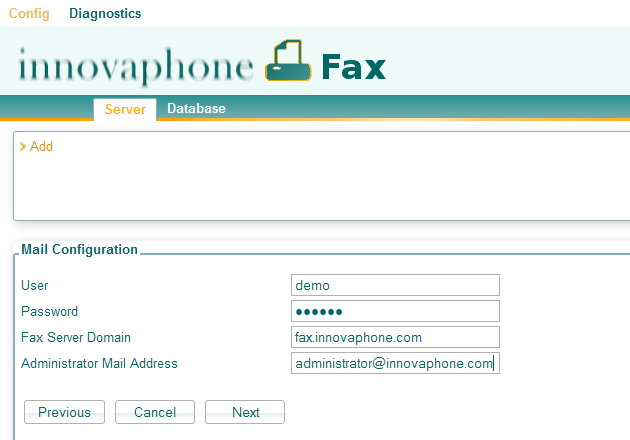
* Enter the SMTP authentication credentials to send an email to the internal mail server, the | * Enter the SMTP authentication credentials to send an email to the internal mail server, the fax server domain and an administrator email address: | ||
[[Image:faxserver_add_mail.png]] | [[Image:faxserver_add_mail.png]] | ||
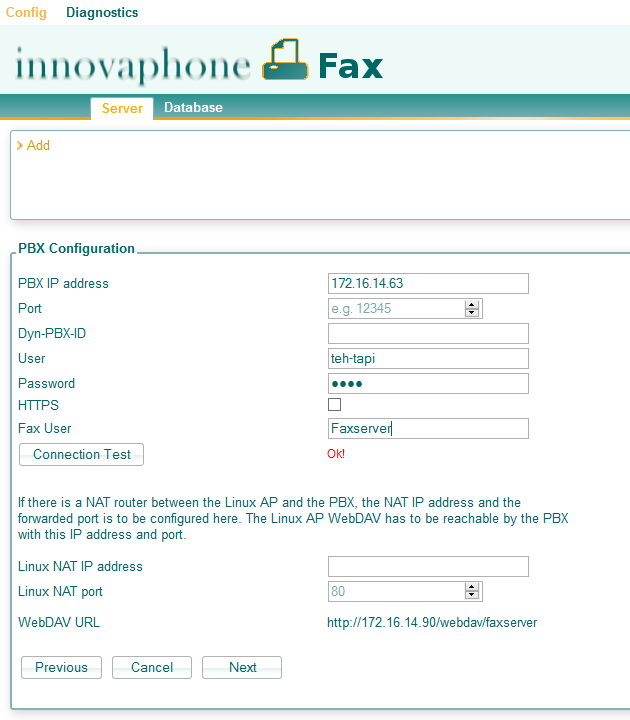
* Enter the PBX-SOAP and gateway object informations. Please test the connection with the ''Connection Test'' button: | * Enter the PBX-SOAP and gateway object informations. Please test the connection with the ''Connection Test'' button: | ||
| Line 34: | Line 34: | ||
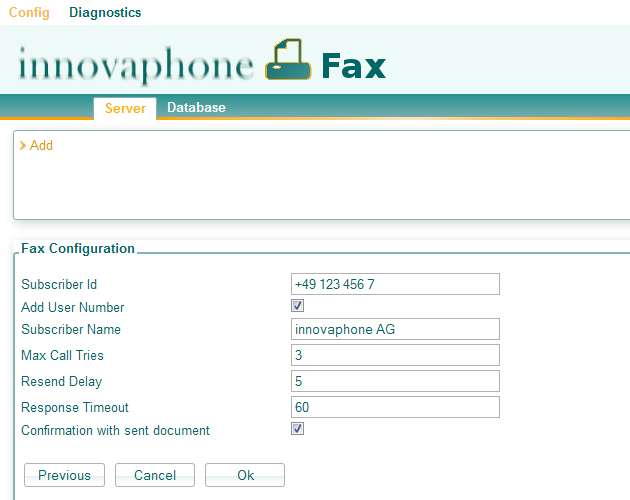
* Enter fax specific configurations. The subscriber id includes the fax gateway object number: | * Enter fax specific configurations. The subscriber id includes the fax gateway object number: | ||
[[Image:faxserver_add_fax.png]] | [[Image:faxserver_add_fax.png]] | ||
* Send an email to the | * Send an email to the fax server as SMTP server with SMTP authorisation with the recipient address ''public number@fax server domain''. | ||
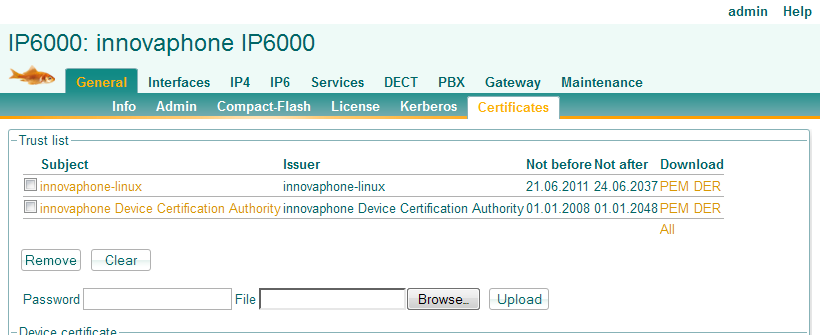
* This fails if the ''innovaphone-linux'' certificate is not yet trusted. Trust it at the innovaphone device: | * This fails if the ''innovaphone-linux'' certificate is not yet trusted. Trust it at the innovaphone device: | ||
[[Image:faxserver_certificate.png]] | [[Image:faxserver_certificate.png]] | ||
Revision as of 09:35, 3 May 2013
This documents explains a step-by-step installation and configuration of the innovaphone fax solution.
Applies To
This information applies to the innovaphone firmware V10 final and Linux application innovaphone Fax V10 final.
Installation
- If the innovaphone Linux Application Platform is not yet running, install it with this instructions.
- Download the latest innovaphone Fax application file and upload it to the innovaphone Linux Application Platform:
Configuration
- Add a PBX Gateway object with a number and the enabled prefix option.
- If there is not yet a TAPI login in the PBX, add a PBX User object for it with at least group CF rights and a set password.
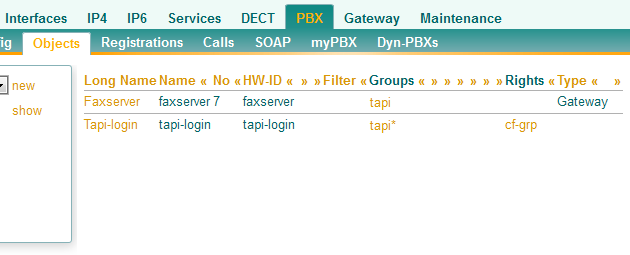
- The TAPI login and the gateway object must be in the same group and the TAPI login object must have active group notifications:
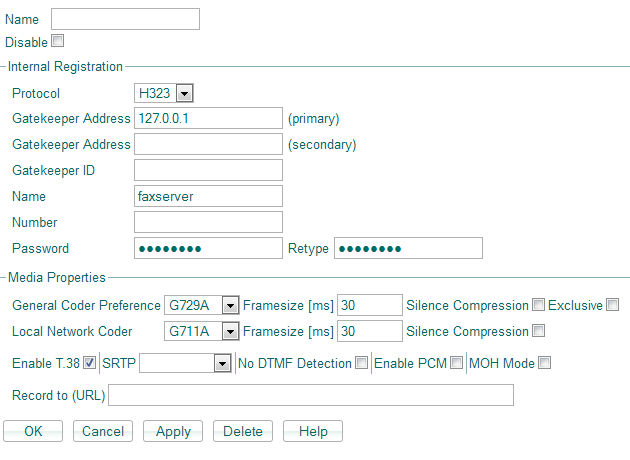
- Add the registration in the Gateway FAX interface to the PBX Gateway object with the enabled T.38 option:
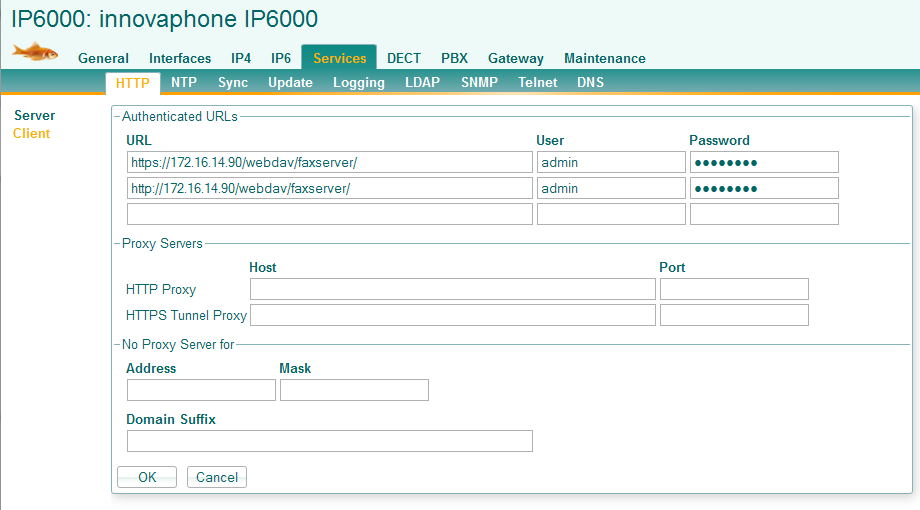
- Add the HTTP login credentials for the fax server Webdav folder at the HTTP client:
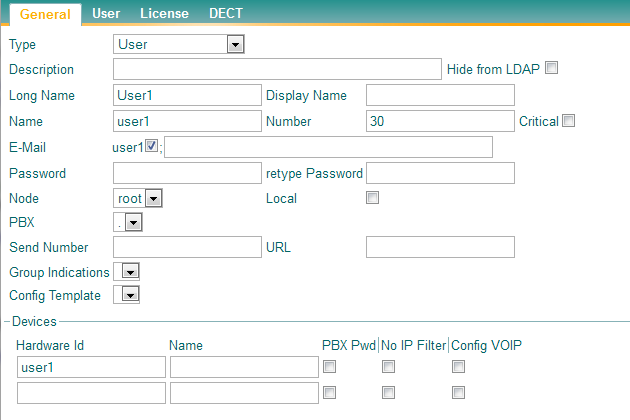
- Configure at least one email address for each user:
- And enable the fax license for each user which is allowed to send or receive fax documents:
- Add a new fax server configuration at the Fax application page with the add link:
- Enter the server specific issues:
- Enter the SMTP authentication credentials to send an email to the internal mail server, the fax server domain and an administrator email address:
- Enter the PBX-SOAP and gateway object informations. Please test the connection with the Connection Test button:
- Enter fax specific configurations. The subscriber id includes the fax gateway object number:
- Send an email to the fax server as SMTP server with SMTP authorisation with the recipient address public number@fax server domain.
- This fails if the innovaphone-linux certificate is not yet trusted. Trust it at the innovaphone device:

