Howto15r1:Configure Calendar Presence Sync by Connector for Microsoft365
Applies To
This information applies to Connector for Microsoft 365 from version 15r1
More Information
This article outlines a configuration scheme for Connector for Microsoft365 functionality.
In preparation, you first will need to configure one Application in your Azure Portal.
After that, you will install the App in your Application Platform, and configure everything.
System Requirements
- Licenses innovaphone Connector for Microsoft 365 per user who wants to use the innovaphone myApps Connector for Microsoft 365.
- account in Azure Portal of Microsoft (for each of the technical communication users, no permission role needed)
- Must have access from the internet to your App Platform
- This can be done by using a reverse proxy or other firewall
- The public endpoint must have a valid, public signed certificate (in order to make a trusted SSL connection from the Azure cloud to the Application Platform possible)
- A valid certificate is required in all involved network entities - at least in the App Platform and if used in the Reverse Proxy; to ensure transmission of MS365 HTTPS POST requests to the app service in order to send notifications.
- Admin account for Azure Portal (only necessary for granting needed permission for registered app during setup)
Installation
Configuration in Azure Portal
Create an App for syncing Calendar Events from Teams to PBX
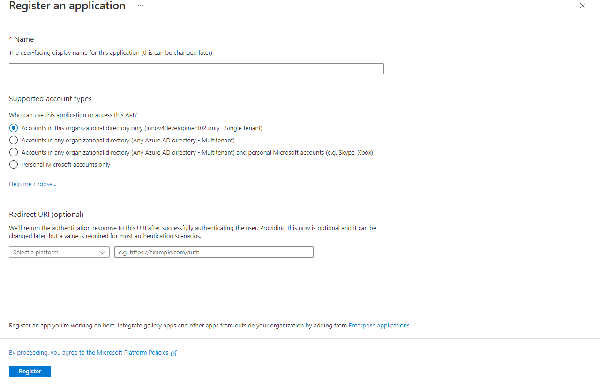
- In the Azure Portal of Microsoft you have to add an app registration
- You only have to give a name for the app
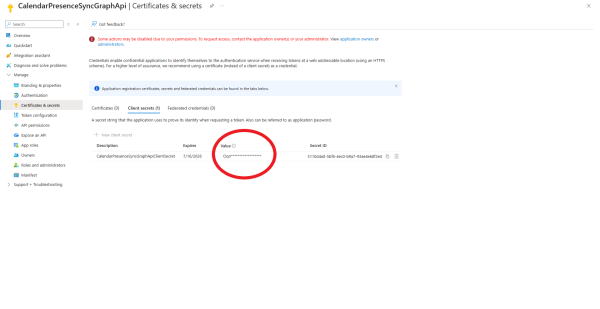
- Switch to Certificates & Secrets on the left
- You only have to configure a client secret and save the value for the configuration of the app
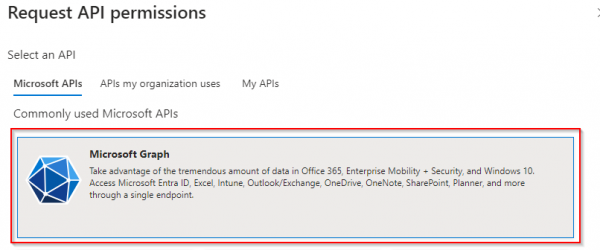
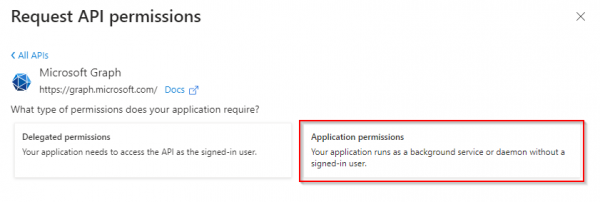
- Switch to api permissions on the left
- You have to configure application permission (Calendars.Read) and (User.Read.All) as shown in the picture
- Grant access to the api permissions, if not possible you have to ask an admin
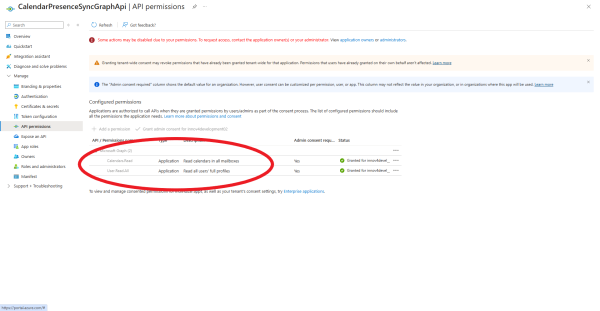
installation and configuration of the App
Install the App with the Settings App - AP app installer plug-in
Go to the Settings App and open the "AP app installer" plugin. On the right panel, the App Store will be shown. Hint : if you access it for the first time, you will need to accept the "Terms of Use of the innovaphone App Store"
- In the search field located on the top right corner of the store, search for "Connector for microsoft 365" and click on it
- Select the proper firmware version, here "v15" and click on install
- Tick "I accept the terms of use" and continue by clicking on the install yellow button
- Wait until the install has been finished
- Close and open the PBX manager to refresh the list of the available coloured AP plugin
- Click on the "AP microsoft365" and click on " + Add an App"
- The "Name" display name field (all characters allowed) and the "SIP" administration field (no spaces, no capital letters) are prefilled, you can leave them as they are.
- Click OK to save the settings and a green check mark will be shown to inform you that the configuration is good
Add the admin app to a user or a template
To be able to configure the connector app, you need users to have access to the admin app.
You can achieve this by adding the app to a user, or to a template.
In this Howto - as an example - we will add the app to the Config Admin template.
- In the PBX Manager
- select the
Templatestile - click on the
Config Admintemplate
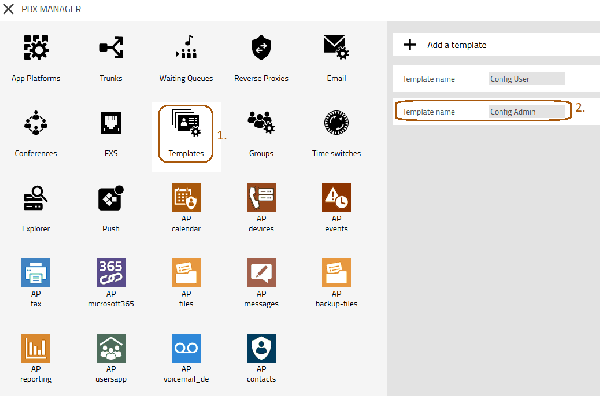
- In the
Config Admintemplate
- open Apps
- Check the
app namecheckbox - Save the changes
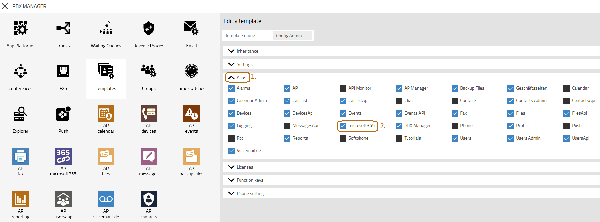
Configure the connector with the admin app
Now your admins (designated groups or configured user) should have access to the connector admin app.
- A user with access to the app can now see a new tile in the All Apps area
- The name depends on the configured
app namefrom the PBX Manager plugin
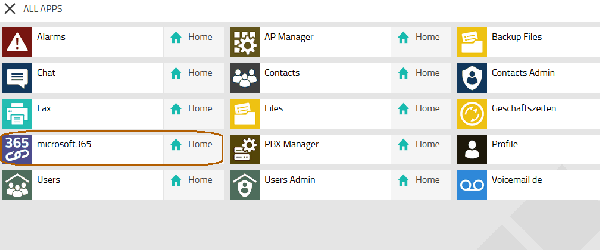
Synchronization from the Teams to PBX
- For the calendar synchronization you select from Teams to PBX for Calendar Presence in the admin app
- ClientIDCalendar - Please insert the Application ID (Client ID) from Azure Portal from the in preparation created Calendar app
- TenantCalendar - Please insert the Directory ID (Tenant) from Azure Portal from the in preparation created Calendar app
- ClientSecretCalendar - Please insert the shared secret from the in preparation created Calendar app
- NotificationURLCalendar - You need to specify the address Microsoft can send presence updates to
- You need to make sure that you define a URL where you can reach your App Platform from the public internet
public.dns - Next you need the domain you have configured in the app instance before (3.2.2)
your.domain - Next you need the name of the instance you have configured before (3.2.2)
microsoft365 - The URL will always be terminated by
subscriptionshttps://public.dns/your.domain/microsoft365/subscriptions
- You need to make sure that you define a URL where you can reach your App Platform from the public internet
Related Articles
Concept App Service Connector for Microsoft 365
Howto15r1:Configure User Presence Sync by Connector for Microsoft365
