Howto:Integrating Shelly IoT Devices with the innovaphone Buttons App
Shelly, a European (Bulgarian) manufacturer, offers a wide range of Internet of Things (IoT) sensors and actuators. This article will guide you through setting up and using Shelly digital inputs (contacts) to interact seamlessly with the Buttons App.
The possibilities are truly endless! Imagine triggering a phone call when a door contact closes, sending an instant message, initiating time tracking, or even setting up complex conditional actions. That's because the Buttons App allows you to assign a series of parallel actions to any specific event.
In this document, we'll walk you through every step of integrating your Shelly devices with the Buttons App.
It's surprisingly straightforward - let's get started!
Applies To
• myApps V15r3 or higher
• Buttons App V15r4 or higher
Note: Tests with Shelly devices were conducted using Shelly firmware version 1.6.2.
Introduction
This article provides a straightforward explanation of the basic concepts needed to integrate Shelly devices with the Buttons App.
Please note: We are not Shelly specialists. For detailed information, consult the manufacturer's documentation, as well as the many forums and videos available online on this topic.
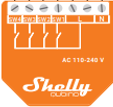
In this guide, we will specifically cover the integration of digital inputs (contacts) for the Shelly i4, Shelly Plus1, Shelly Pro2 and Shelly Pro RGBWW models.
While motion sensors and the Shelly USB dongle can also be integrated, they are not covered in this article. However, as Shelly products share similar characteristics, you'll likely find useful insights applicable to other models as well.
Each Shelly device comes with its own mounting instructions; here, we will only briefly touch upon a few key details.
It is crucial to read and strictly adhere to all safety guidelines.
These devices are typically powered by hazardous voltages (usually 220V in Europe). Installing a residual current device (RCD), also known as a ground-fault circuit interrupter (GFCI) in some regions, upstream in the electrical circuit is highly recommended and, in some countries, legally required.
Overview
The Buttons App is an application that lets you link specific input events to various output actions. Examples of input events include calls, function keys on innovaphone IP phones, and other applications, as well as the messages received from Shelly devices. Output actions can be calls, notifications, chats, messages, or applications.
For a comprehensive description of the Buttons App itself and a complete list of supported input and output devices, refer to the Buttons concept article (link at the end of this document).
Electrical Connections
The Shelly models discussed in this article are powered by 110 to 240 Volt AC, 50/60 Hz. Please be aware that these voltages are hazardous. Never work on electrical networks without a residual current device (RCD/GFCI) installed. Before mounting or connecting any device, ensure that all wires (not just the live wire, but also the neutral) are disconnected.
Some models can also be powered by 12V or 24-48V DC.
Third-generation Shelly devices feature polarity protection on the AC side. This means the Shelly will function correctly even if the live (L) and neutral (N) wires are inverted.
Important Note: In networks with delta connections, both wires carry voltage.
For intrinsic safety reasons, it's often common practice to switch the neutral wire, which typically carries no voltage during normal operation. The drawback of this approach is that troubleshooting a potential interruption becomes more difficult (whereas with the live wire, a simple voltage tester suffices to follow the line). Both wiring variants are functional.
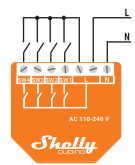
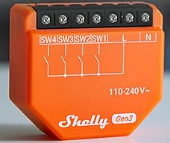
Note: Shelly devices typically have the wiring diagram silk-screened directly on them, as shown in this example for the Shelly i4:
It represents the connections to the outside world, not the internal operation of the device, as further highlighted in the instructions:
Note: As per the diagram, the Live (L) phase is connected to the output towards the contacts. If installed within the same electrical network, it's also possible to power the inputs directly from the live phase, rather than using the Shelly's output. However, in this case, ensure the polarity matches the diagram (L and N as shown). If inverted, you'll need to switch the neutral.
Note: On Shelly Pro devices, the silk-screened diagram corresponds exactly to what's detailed in the instructions.
Contacts
Shelly devices are incredibly versatile, reacting to both the closing and opening of a contact. What's more, they send messages for various interactions like a quick click (fast open-close), double-click, triple-click, and even a prolonged closure (a "Long" press). This "Long" event is also sent for a static closure after a timeout, making it perfect for sustained button presses. The Buttons App can handle all these event types, individually or in combination, giving you immense flexibility.
In safety circuits, contacts are typically normally closed and open in the event of an alarm. This design ensures that a broken wire will also trigger a detection, enhancing safety.
Both Shelly and the Buttons App can be used with circuits featuring:
• Normally open contacts that close and remain closed.
• Normally closed contacts that open and remain open.
• Momentary contacts that close or open (like a push-button).
All transitions, meaning the change from one state to another, will be signaled and can be utilized for various actions.
If a Shelly device restarts, its current status is immediately reported to the Buttons App. Should the contact state change during a restart or while the device is powered off, this new state will be transmitted to the Buttons App, which will then react accordingly.
Mounting
For their "home" models, which are designed for installation in standard electrical boxes (typically for light switches), Shelly offers a DIN rail adapter. This allows for easy mounting in electrical cabinets:
The adapter features an opening on the back, allowing access to the reset button.
Keep in mind: You can only press this button if no other devices are installed close by on the DIN rail. The adapter can be mounted 180 degrees, making the reset button accessible from either the right or left side. Once configured, you typically won't need to use the physical reset button, as a reset can also be performed via the app or web interface if the device is reachable by IP. After a restart, the device's status is also refreshed.
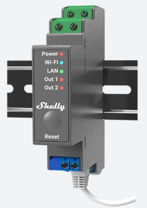
In contrast, Pro models are designed exclusively for DIN rail mounting and have their reset button conveniently located on the front, accessible even with the cover closed. They also offer options to customize the behavior of the reset button.
Configuration
First Steps with Shelly Configuration
Once a Shelly device is powered on, it starts up and is ready for use in approximately 5 seconds.
Shelly devices can be accessed via Wi-Fi or Bluetooth. The "Pro" family of devices can also be reached via an Ethernet connection.
Note: Some products are also accessible via USB dongles, but this is not covered here.
For initial configuration, you'll need to install the manufacturer's Shelly Smart Control app on your smartphone. Afterward, you'll establish a Wi-Fi or Bluetooth connection between your smartphone and the Shelly device. For our application, Bluetooth is primarily used for the initial setup; subsequently, the device will connect to a local Wi-Fi network or, in the case of Pro models, your local area network (LAN).
Download and install the Shelly Smart Control application from your respective app store (Google Play or Apple App Store):
If you don't already have one, create a Shelly account (it is free).
You'll be prompted to set up the parameters for your local Wi-Fi network, which the device will then connect to. To make the device discoverable by your smartphone, press the reset button on the Shelly device for 10 seconds. Follow the app's instructions to add the device to your list.
Important Note: A device initially registers with the Shelly manufacturer's platform, where its serial number is apparently stored. Once a device has been registered to one account, it cannot be registered to another account, even after a factory reset of the Shelly. If a device is registered to your account, no one else can use it unless you first delete it from your account. This is presumed to be a security feature designed to protect a specific device from unauthorized use.
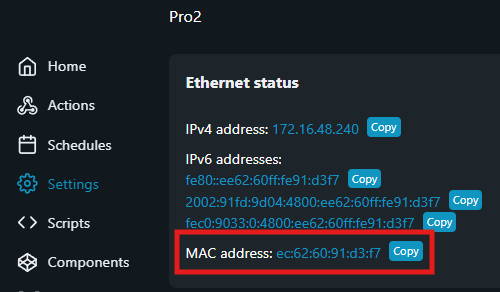
In the Shelly ecosystem, the serial number and MAC address are the same. Each Shelly device will register with its unique address to the Buttons App. If a device has multiple inputs or outputs, it will still have a single address, and the interface number will be contained within the message itself, even if they appear as distinct devices in the Shelly App.
Initial Setup
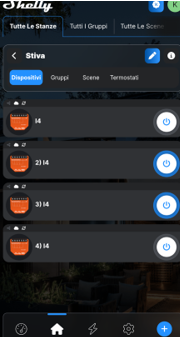
After adding your Shelly devices to your application, you can access the individual installed models. The example below shows the page for a Shelly i4, which offers four inputs:
At this stage, you can observe the opening and closing of contacts directly in the app; the display shows the status changes in real time. In the example above, contacts (inputs) 2 and 3 are closed, while contacts 1 and 4 are open. This test is convenient for verifying inputs but is not strictly necessary.
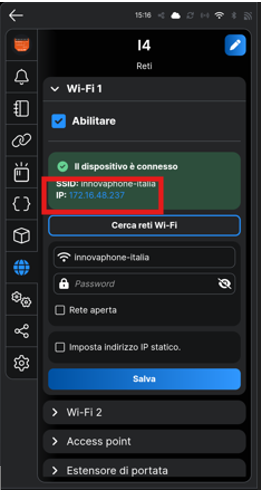
Clicking on any of the Shelly devices opens its configuration page. Here, you'll find the IP address at which the device is accessible via a web browser:
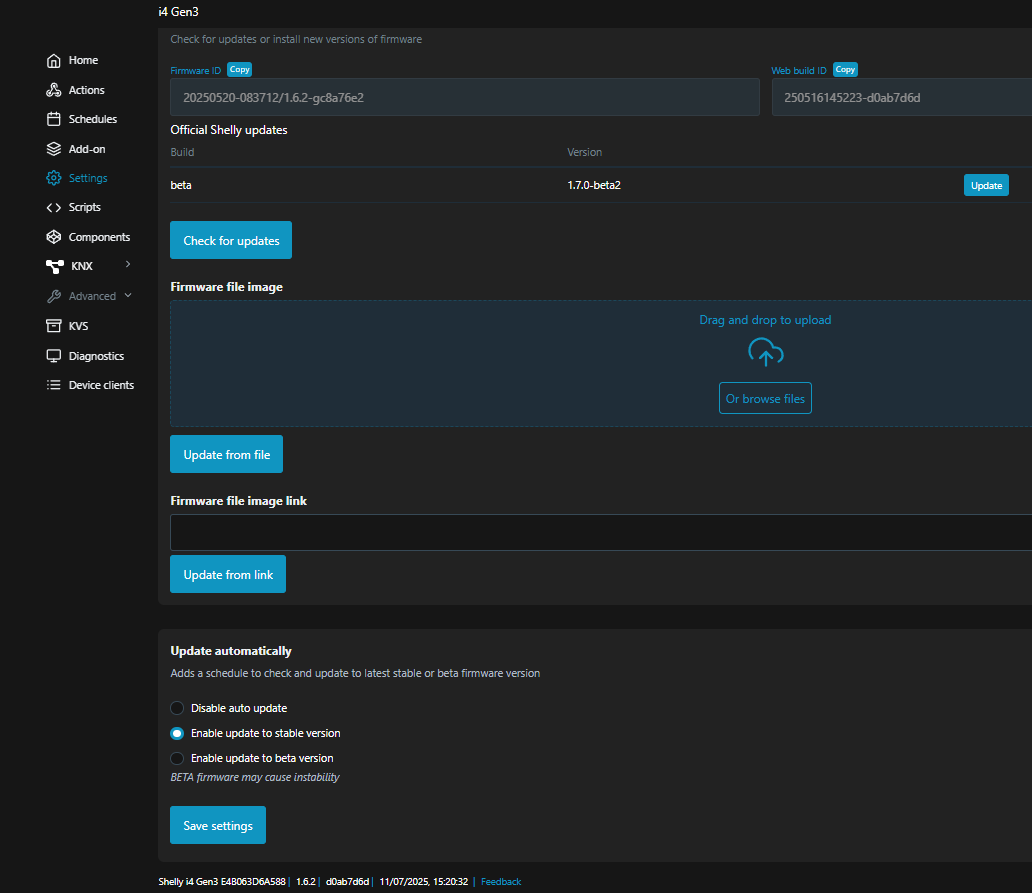
Access now the device via your browser, select "Settings," then "Firmware":
Update the Shelly to the current stable firmware version.
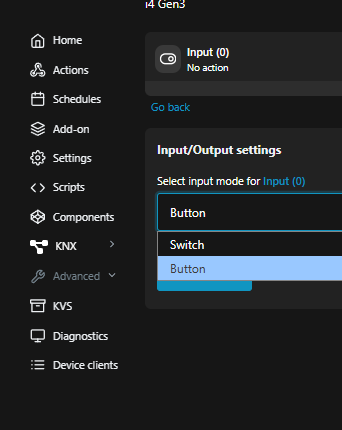
After the required restart, return to the home page and select an input, for example, "Input(0)," and then "Input/Output settings":
If you have a Plus or i4 model, select "Button" (the default setting is "Switch"). Repeat this setting for all inputs. If you have a Pro model, this setting is different and described in its dedicated section below.
Connecting Shelly and the Buttons App
Shelly devices must register with the Buttons App to send status messages. Therefore, each Shelly device needs to be configured with the destination path to the Buttons App.
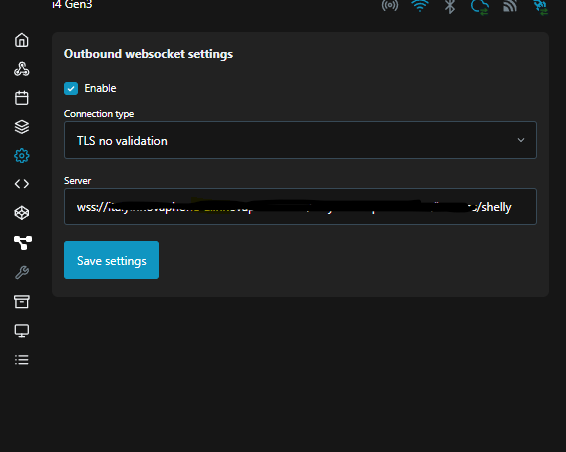
This path is configured on the Shelly in the menu "Settings," then "Outbound websocket":
Check "Enable," then under "Connection Type," select "TLS no validation."
The path is configured in the "Server:" field.
The format is: “wss:// + destination + /shelly”.
Here's how to securely and easily determine the "destination":
Open the PBX advanced interface (devices) and then the "PBX" page. In the "DNS" field, you'll find the name of your PBX:
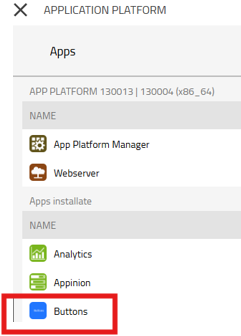
Make a note of this name, as it's the first part of your destination. Now, open the Application Platform and select the Buttons App.
Note: If the Buttons App isn't installed, now is the time to install it on your Application Platform:
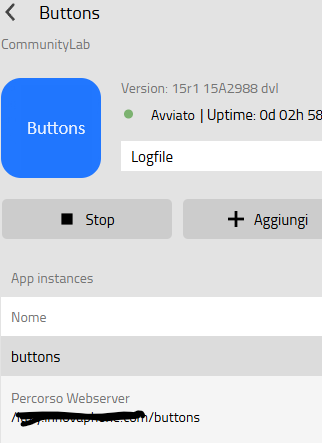
Clicking on "Buttons" will reveal the Webserver path:
Notice that the path ends with "buttons".
The complete path to enter into the Shelly will be composed of these two names.
For example, if your PBX DNS is "testpbx.com" and the Buttons App Webserver path is "butt.mypbx.com/buttons," the complete destination path to set in the Shelly will be: “wss://testpbx.com/butt.mypbx.com/buttons/shelly”
Once correctly configured and put in the Server input field, the Shelly device will be registered with the Buttons App and start sending messages.
To verify registration, open the Buttons Admin App:
Clicking on the "Connected devices" button will display the name and serial number of the connected and registered Shelly devices:
In the example above, three Shelly devices (Plus 1, Pro 2, and i4) are connected.
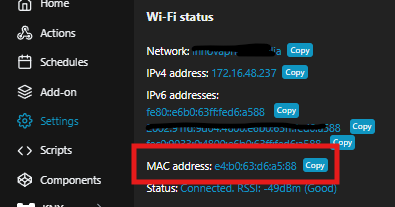
This screen also shows the Shelly's serial number, which you'll need later to set up the Buttons App. You can also find the Shelly serial number on the Shelly's "Wifi" page:
Caution: The address shown in the Shelly's "Bluetooth" menu is different and will not be used by the Buttons App. For the Shelly Pro, the serial number is visible on the "Ethernet" page:
Note: You can copy and paste the serial number into the Buttons App even with colons; they will be automatically discarded by the Buttons App.
Note: You can also retrieve the serial numbers directly from the logging, as explained in the relevant section.
Shelly i4 (3rd Generation)
This model features 4 digital inputs (ON/OFF).
In the Shelly App, you'll see 4 "devices" (which is actually just one physical device), and each contact will be treated as if it were a single device.
The Shelly i4 Gen3 has 4 inputs (from port 0 to port 3, corresponding to SW1 to SW4), and all messages will be sent with the same serial number.
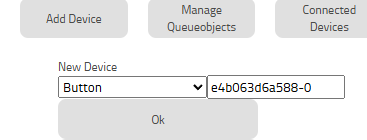
To add a Shelly i4 port to the Buttons App, press "Add Device," then under "New Device," select "Button" as the type, and enter the serial number followed by a hyphen "-" and the port number:
In the example above, we've created the connection with the first port (SW1); the second port (SW2) will be device e4b063d6a588-1, and so on.
Shelly Plus 1
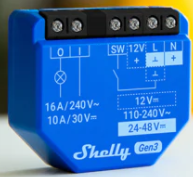
The Shelly Plus 1 has one input and one output.
Similar to the Shelly i4, the input port should be indicated with "-0":
In the example above, the serial number for the Shelly Plus 1 is 78ee4ccf5930.
Shelly Pro 2
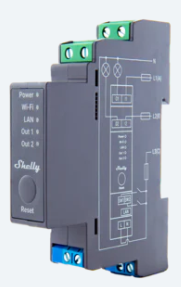
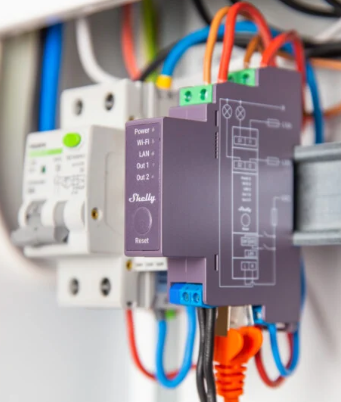
The Shelly Pro differentiates itself from other Shelly devices as it's designed exclusively for DIN rail mounting in electrical cabinets:
It also features a LAN port, allowing it to connect to an Ethernet network even without Wi-Fi or Bluetooth (though both are onboard). It doesn't require an internet connection, but it can be useful for initial setup and firmware updates.
It has two inputs and two outputs, all designed exclusively for 220V circuits (110-240 VAC 50/60 Hz).
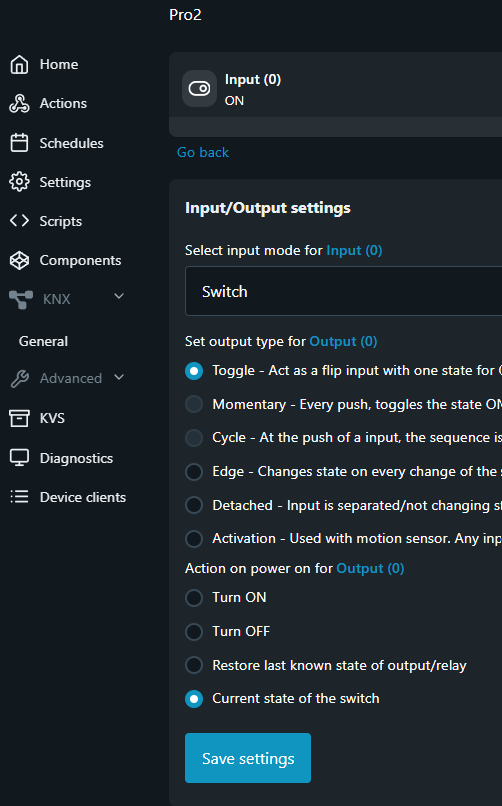
It's configured similarly to the other Shelly devices described above, but with the key difference that triggering by the Buttons App occurs on the outputs. The Buttons App therefore reacts to changes in the state of the outputs, regardless of whether they are switched via the web or other settings. If you want to transmit the state of the inputs (as in the case of the other Shelly models described), you'll need to configure the Shelly Pro 2 for its outputs to follow the state of its inputs.
Here's an example of this setting, where the input port (input 0) controls the output port (output 0):
Note that in the setup above, even after a restart, the output will follow the current state of the input (which is usually the desired behavior).
Once you've set the Ethernet parameters (Client, Server, and Static IP modes are available), you can disable Wi-Fi settings, cloud settings, and "Access Point" mode (which also disables "Range extender" mode).
Note: With Wi-Fi disabled, you will no longer be able to access the Shelly Pro 2 from the Shelly App. However, the application remembers the settings you configured before disabling Wi-Fi access. This can be helpful if, for example, you want to check the IP address (unless it has been changed via LAN access).
Shelly RGBWW PM
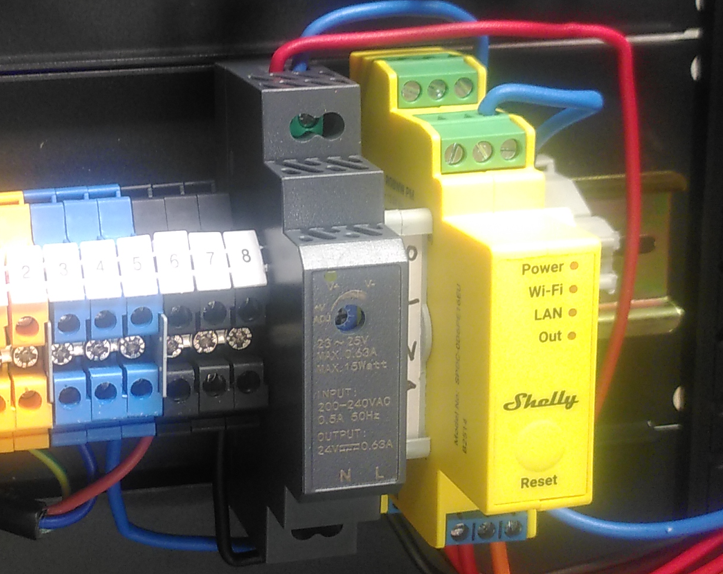
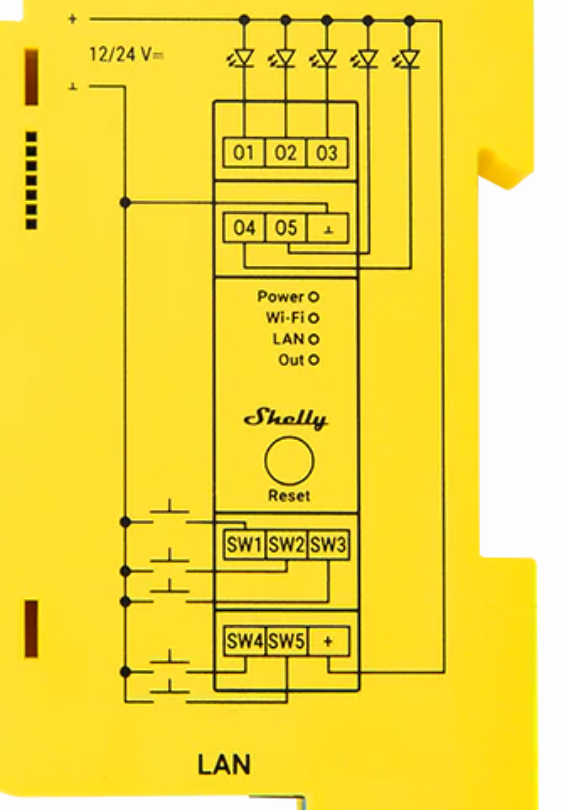
This model is similar to the Shelly Pro 2 (DIN rail mount, LAN), but it has five inputs instead of two and is powered by 24V DC. If you are operating the system on 220V, you will need a transformer.
It is important to note that the external switches connect the 0V line (minus) to the inputs (indicated by the ground symbol in the diagram).
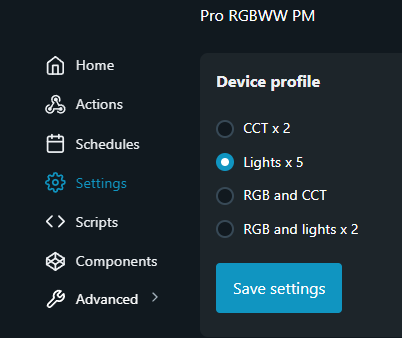
This model has several operating variants, for example, to control colored LED strips. You can set this under Device profile (scroll all the way down), we tested the 5 input operating mode.
The individual inputs (Input 0–4) should be set to Button and Single input. In the Button app, the usual numbering from Serial-0 to Serial-4 will be used.
Debugging
Traffic between the Shelly and the Buttons App (once registered) can be monitored in the Buttons App's Log.
In the Application Platform (where you retrieved the path before), clear the Log, perform a contact closure or opening operation, and then select "Display" from the dropdown menu. A new page will open in your browser:
In the example above, you can see that the Shelly Device model "shellypro2" with serial number "ec626091d3f4" is sending a detected change on input and output "0" and activating "Trigger Switch 6," which sets user 'kwa's presence to "busy."
Note: Changing the presence status is the simplest way to verify proper functionality and requires no additional setup.
