Howto:MyApps Cloud - connecting 2N-Intercom

From innovaphone wiki
Jump to navigation Jump to search

Applies To

This information applies to

  • Howto connect a 2N Intercom device to a myApps Cloud PBX
  • myApps Cloud v13

Scope

The article describes how to configure a 2N Intercom to register and connect to a myApps Cloud PBX

For a better overview, the necessary configuration is divided in 2 parts:

  • The first part covers the respective PBX object
  • The second part describes the configuration of the 2N Intercom device.

Disclaimer

2N is a 3rd party brand. As such, innovaphone is not liable for any malfunction of the 2N firmware itself, or malfunction caused through or due to changes in the 2N firmware.

Requirements

  • innovaphone myApps Cloud PBX
  • 2N intercom device
  • PBX-Port licence for registration of the intercom at the pbx
  • optional PBX-Video or PBX-UC license for the intercom pbx-userobject to establish video connections

Considerations

The parameters below are innovaphone default settings. These settings might be different in the specific cloud environment. Thus, please check your documentation and take a note of the corresponding parameters of your specific cloud instance.

  • 2N does not deploy device certificates on its devices. Thus, secure TLS connections to the myApps Cloud platform are not possible.
    Due to this reason, this example uses a connection via SIP/TCP.
  • The system name (devices domain name) of the PBX in this example is: company25.org
  • The URL or the respective PBX in this example is: 01234-pbx.innovaphone.com

Configuration innovaphone myApps Cloud PBX

Setting of the PBX User Object

  • Open the PBX User Object, of the respective 2N Intercom User
  • Define a secure password
  • In the section Devices, please fill the fields as following:
    • TLS only: 'off'
    • Reverse Proxy: 'on'
    • Media Relay: 'on'
PBX - Settings

Configuration 2N Intercom

Prior to proceed with the configuration of the 2N device, please make sure the device contains the most recent Firmware.

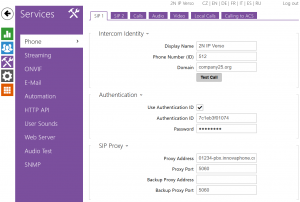
Tab: Services > Phone

The basic SIP parameters to register on the PBX

  • Phone Number (ID): the PBX extension of the Intercom
  • Domain: The system name (devices domain name) of the PBX
  • Authentication ID: The name of the user object in the PBX
  • Password: The name of the password, defined in the respective user object
  • Proxy Address: The URL of the PBX
Intercom - Basic SIP Settings

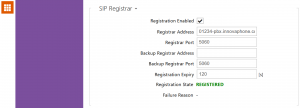
In the following, lets SIP Registrar

  • Registration Enabled: 'on'
  • Registrar Address: The URL of the PBX
  • Registration State: 'REGISTERED' should appear, as soon as the Intercom device successfully registered on the PBX
Intercom - SIP Registrar

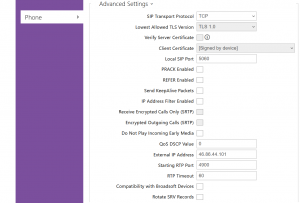
Configure the Intercom's 'external' IP address

  • 'External' IP Address: IP address, through which the device is reachable.
  • Known issue:
    • As described above, 2N requires the 'Media Relay' checkbox in the PBX user object for audio.
    • But for video, 2N does not perform a media relay.
    • 2N only transparently forwards the video SDP to the remote endpoint.
    • Video is therefore only possible if both endpoints are on the same LAN.
    • Consequently, to make VoIP communication possible on the same LAN, this address has to be configured on the device.
    • Please make sure, the entered IP address is a fixed, an not a dynamic IP address.
  • Clarification:
    • As 2N Intercom devices do no support STUN, the device itself does not know the 'external' public IP address, through which it is reachable (WAN).
Intercom - IP settings

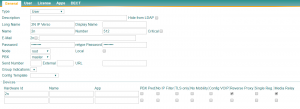
Tab: Directory > Users

The Users list contains user information, relevant for the quick dialing.

  • Register Username and extension number, of the person who shall answer the Intercom.
Intercom - User settings

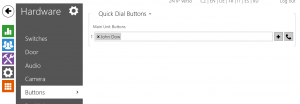
Tab: Hardware > Buttons

  • Here you have to assign the previously defined user to the Intercoms quick dial buttons.
  • Skipping this step, the Intercom will not dial the PBX.
Intercom - Buttons

Validation

  • Initiate a Test Call to verify your configuration...