Howto14r2:Step-by-Step Shared Conference ressources in the Cloud
Description
If you have difficulty understanding the written language, we recommend to use www.deepl.com for translation. If installed, you can also use the translation function of your browser by right-clicking.
This document shows how to set up an innovaphone PBX as External Conferencing Resource and explains the necessary configuration steps.
Description
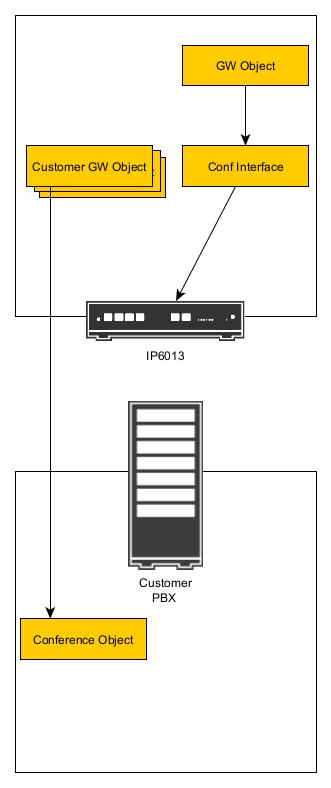
An innovaphone PBX can act as External Conferencing Resource, especially useful when used in conjunction with IPVA cloud instances. We call it Conferencing Gateway from this onward.
Requirements
- innovaphone PBX
- The Conf Interface registration requires one Port License
- Every PBX registration requires one Port License on the PBX
- App(innovaphone-pbx-conferencing) License
Generic Pre-Configuration
The following configuration steps are done on the Conferencing Gateway.
Setting up the Conferencing Gateway
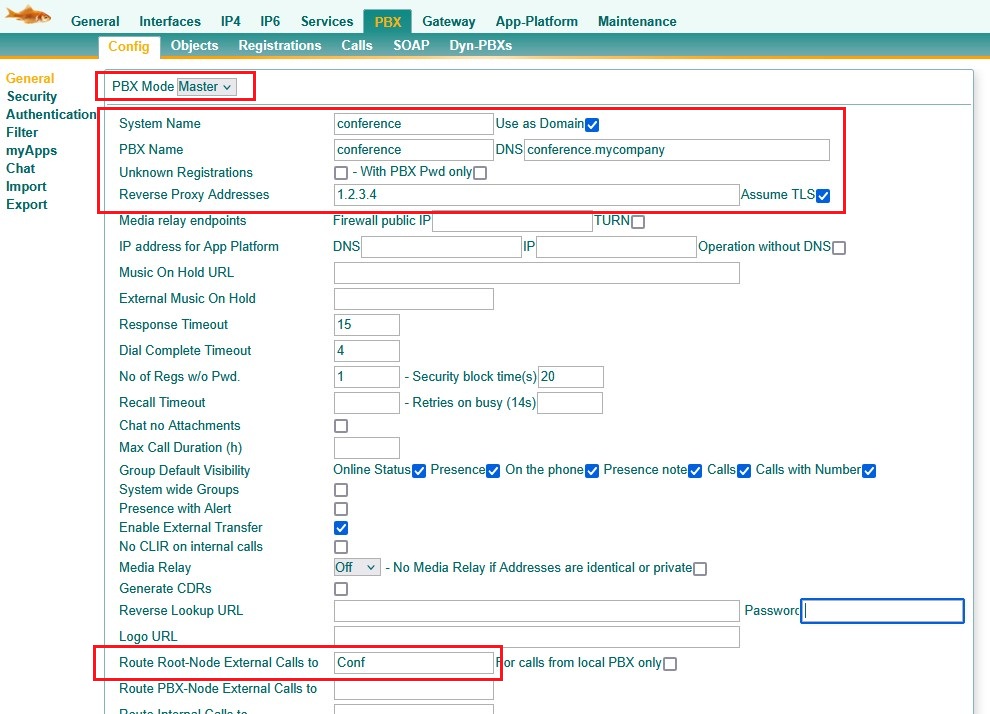
Go to PBX/Config and choose Master as PBX Mode and enter the following parameters:
- System Name / PBX Name / Reverse Proxy Addresses: Set accordingly to your setup
- "Route Root-Node External Calls to": In this example, we will enter "Conf". You can choose the name as you wish but note we will need it later
Setting up the Conferencing Interface
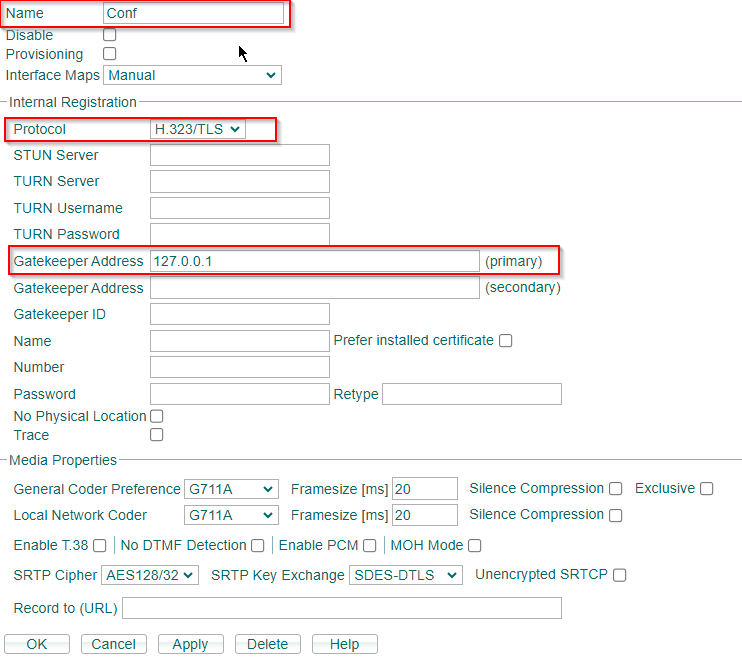
Go to Gateway/Interfaces and click on the CONF Interface and enter the following parameters:
- Name: Conf
- Protocol: H.323/TLS
- Gatekeeper Address: 127.0.0.1
Registering the Interface
Now we will register the Conferencing Interface to a PBX Object.
- Head to the Section PBX/Objects
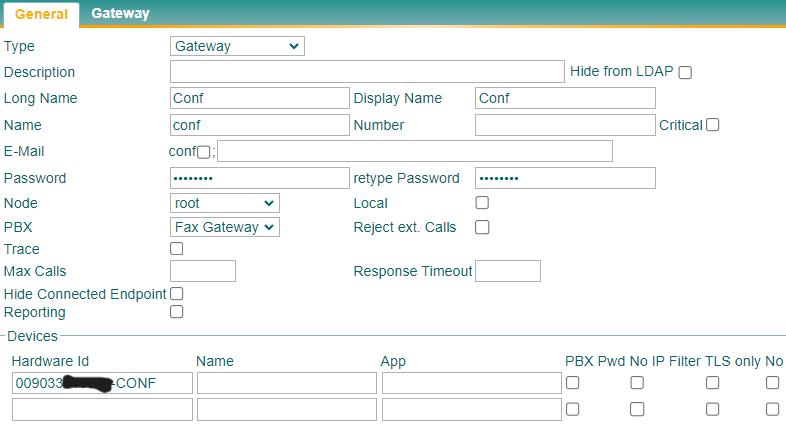
- Create a new Gateway Object
- Enter the following parameters:
- Long Name: Conf (this name is important for the step above in "PBX Configuration")
- Display Name: Conf
- Name: conf
- As Hardware ID you enter your Conf Gateways "MAC Address-Interface", e.g. 12ABC7426CDD-CONF
Customer-Specific Configuration
Now we will configure the options which are specific to the customer. Steps in the first section are done on the Conferencing Gateway while the steps in the second section are done on the customers PBX/IPVA. In this article we will use "kunde1" as reference.
Configuration of the Conferencing PBX
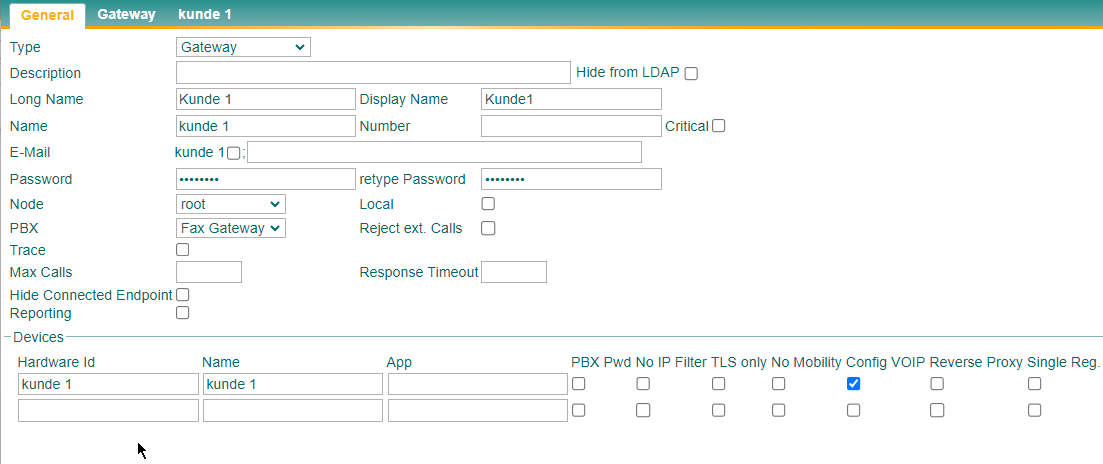
- Go to PBX/Objects and create a new Gateway Object
- Enter the following parameters:
- Long Name: Kunde1
- Display Name: Kunde1
- Name: kunde1
- Password
- Edit following parameters in the Devices section:
- Hardware ID: kunde1
- Name: kunde1
- Config VOIP: Enable
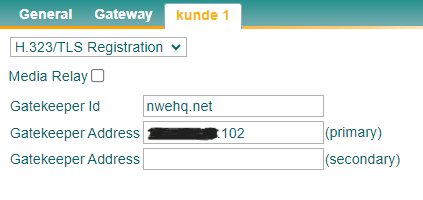
After pressing on Apply you can see a new section has appeared on the top.
- Click on that section and choose H.323/TLS in the drop-down menu
- Enter the following parameters:
- Customers Gatekeeper ID
- Customers Gatekeeper Address
Configuration of the Customers PBX/IPVA
We will now create the Conference Object on the customers PBX. In this article we will use "Conference" and a free number "80" as reference.
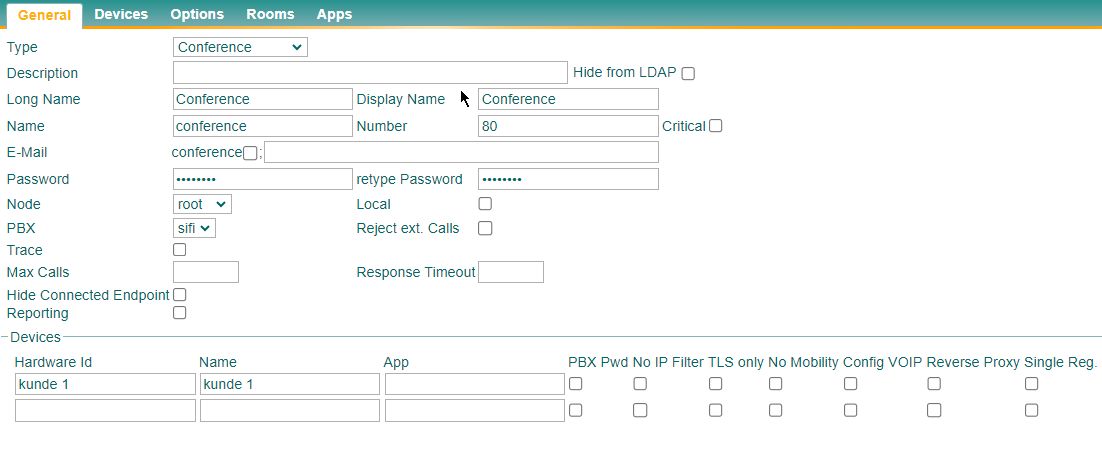
- Open PBX/Objects and add a new Conference Object
- Enter the following parameters:
- Long Name: Conference
- Display Name: Conference
- Name: conference
- Number: 80
- Hardware ID of the Conf object: Here you will enter the name of the Gateway that we just created for the Customer. kunde1 in this instance
- Reverse Proxy: Enable if the Customers PBX is accessed through an RP
- Head to the section Devices
- Enter the Hardware ID
- If the registration was successful you should see an IP-address to the right
Verification
After creating the Conference Object, you will notice that two routes have been configured automatically on the customers PBX.
Create a static room and verify if it works.
- Open your Conference Object and move to the Section Options
- Change Room Number length to 2
- A new Section will appear called Rooms, move to that Section
- Create a new Room
- Call that Room and see if you successfully entered the Room and everything works fine.
