Howto15r1:Step-by-Step Restore a system
If you have difficulty understanding the written language, we recommend to use www.deepl.com for translation. If installed, you can also use the translation function of your browser by right-clicking.
This article explains all the necessary steps to recover a system once it has crashed and you cannot access the App Platform or the PBX.
Purpose
In the event of a disaster, you will want to restore your system as quickly as possible. If a factory reset is your only option, here are some important steps to take afterward.
Features
- Restore a system to normal operation
Limitations
- There is no automated process to restore app services except the Install.
Requirements
- Innovaphone App Platform
- any device running a PBX in V13 or up
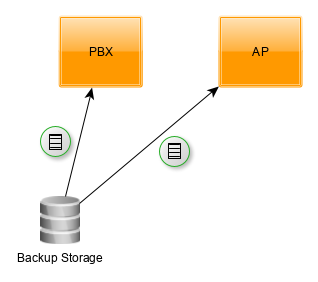
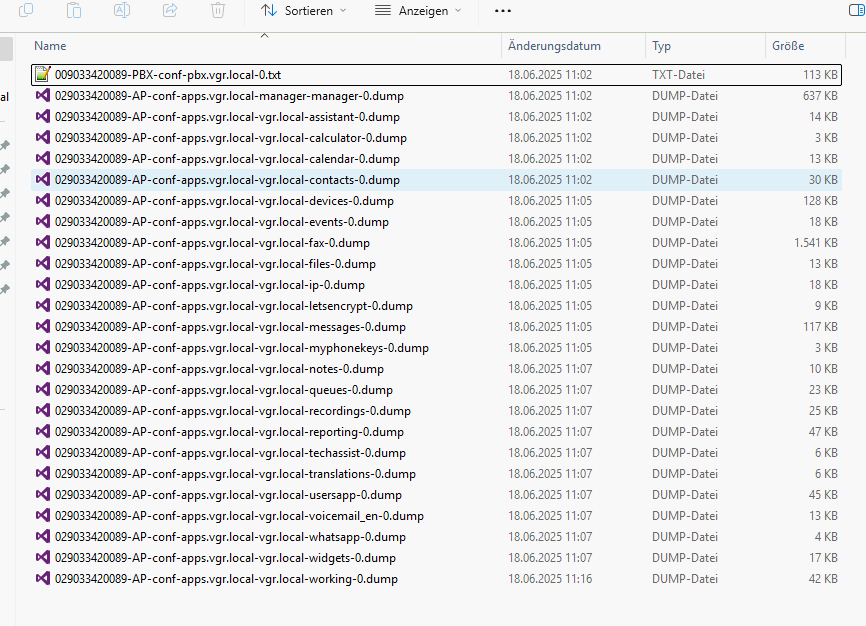
- You will need the PBX configuration as a complete file (not with standard password) and the .dump files of every App service instance which was created by the Devices App backup process, as we explain it in our IT Connect training.
Hint: Please note that you cannot access the backup files instance if the App Platform fails. Therefore, we recommend saving the backup on an external system.
Things to know before you begin
- To restore the System you need the Administrator password which was created during the initial installation. This password could have been overwritten by the system password in devices.
Configuration
The first step depends on your setup.
- If you have a local Application platform, you need to start the Install by selecting Master PBX to start a new system with local app platform
- If your design requires you to have an external App platform, you need to have a virgin AP already in place. This means that an AP with only an AP Manager and Webserver, with default password pwd, should be in place. You can download an App Platform image for a supported hypervisor in our store(http://store.innovaphone.com/release/download.htm). If you have an external App Platform you start the Install by selecting Master PBX to start a new system with external App Platform
- Then, you go through the installation process. The configuration set up during installation is not important because we will overwrite it with our backup anyway, but we recommend setting the domain correctly as this will save you a click later on.
Please save the emergency passwords of this install as well, as we will use it (the Administrator Password and the PBX Password)!
Restore PBX
As a next step, we want to restore the PBX, therefore we will need to access the Advanced UI of the PBX.
- You do that by entering https://<ip-of-PBX>/admin.xml?xsl=admin.xsl
- If a password is required, please use admin as username and the Administrator password saved from the Install.
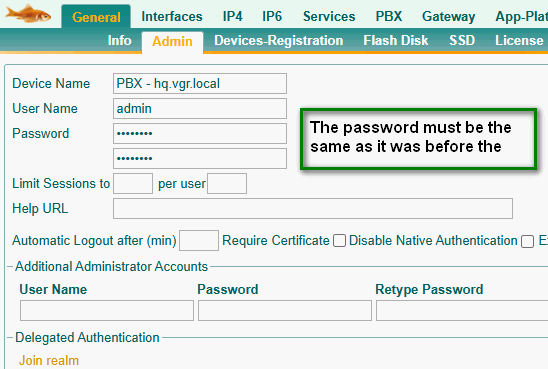
- Go to General/Admin and set the password to what it was before the crash.
- Go to Maintenacnce/Upload/Config and select the PBX config from your backups.
- Click Upload
Hint : keep in mind that by restoring on another hardware, may involve change in the configuration (e.g: local gateway registration with mac address) and licenses need to be uploaded as well. In case of an IPVA, we recommend to assign the same MAC address as before.
Restore Manager
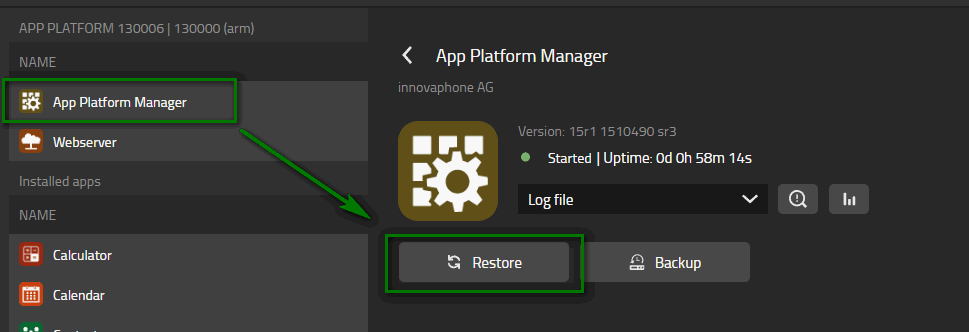
Now we are going to restore the configuration of the App Platform Manager.
- Click on Manager
- Then Restore
- Afterwards click on Upload
- Select the manager-0.dump file
- Upload it
- Wait until it is successfully restored.
Restore all Apps
Fortunately, the Install process has already set up many App Services for us. For the ones that are not, you will need to install them one by one from the App Store in the top right corner. Just search for the app, select the version you want to install, and then press Install. You do not need to set up an App Instance because restoring the backup will do it for us.
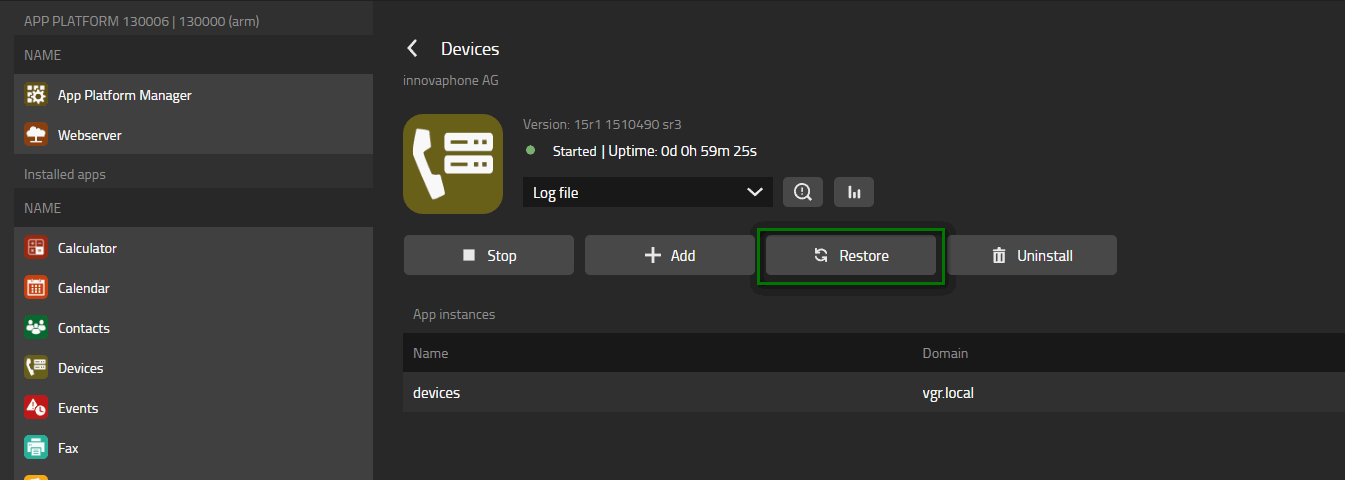
- To restore the contents of an app, click on the app service
- Then Restore
- Afterwards click on Upload
- Select the xxxxx-0.dump file
- Upload it
- Click on OK to overwrite the existing instance.
- Start the Instance
Hint : Special care for the Files App service, it contains 2 instances files and backup-files, do not forget to restore both instances
Verification
Start your myApps client and try any app you want. It should work as before
