Howto:ESTOS Procall 5.0 as UC-Server for Presence: Difference between revisions
| Line 5: | Line 5: | ||
==Configuration of PBX== | ==Configuration of PBX== | ||
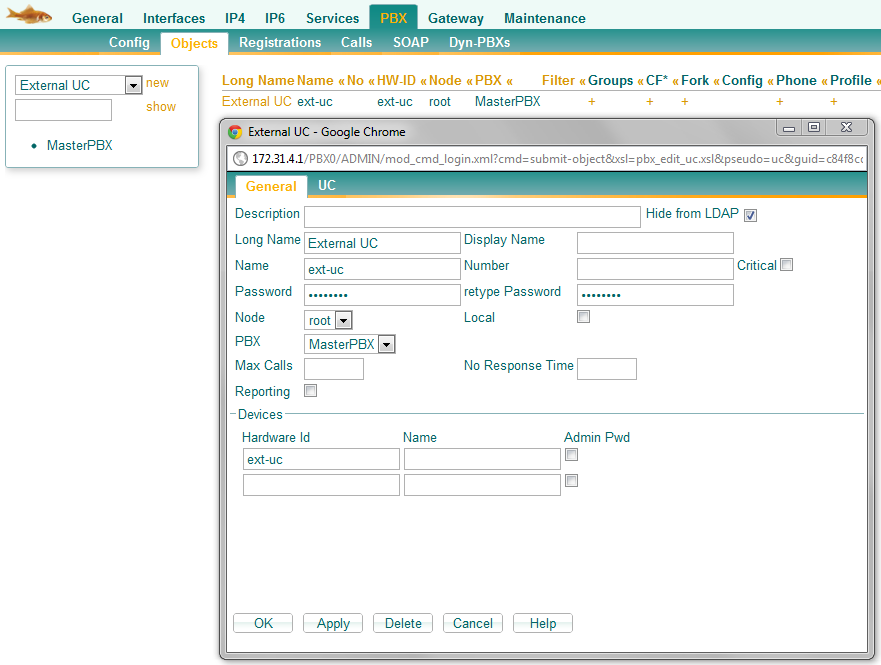
Add a new PBX object of type "External UC". | 1. Add a new PBX object of type "External UC". Give it a Long Name (e.g. External UC) and a Name (e.g. ext-uc). | ||
Give it a Long Name (e.g. External UC) and a Name (ext-uc). | |||
On the "UC" tab enter the URI for the resource list subscription (e.g. allusers@innovaphone.com). | [[Image:external_uc_object.png]] | ||
This URI is used by the PBX to query presence information for all its PBX users. | |||
2. On the "UC" tab enter the URI for the resource list subscription (e.g. allusers@innovaphone.com). This URI is used by the PBX to query presence information for all its PBX users. | |||
[[Image:external_uc_subscribe.png]] | |||
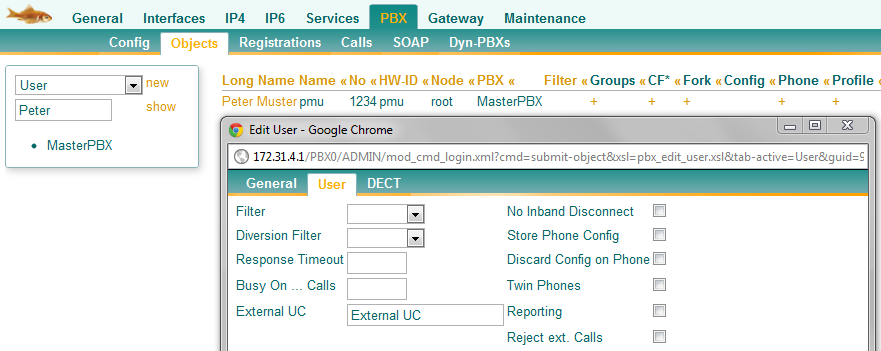
3. Enter at the corresponding users under User/External UC the Long Name (e.g. External UC). | |||
[[Image:external_uc_user.png]] | |||
==Configuration of ESTOS Procall 4.0== | ==Configuration of ESTOS Procall 4.0== | ||
Revision as of 08:57, 29 September 2011
Estos Procall 4.0 can be used as external presence server.
Requirements
Version 9 hf3 (or higher) of innovaphone PBX.
Configuration of PBX
1. Add a new PBX object of type "External UC". Give it a Long Name (e.g. External UC) and a Name (e.g. ext-uc).
2. On the "UC" tab enter the URI for the resource list subscription (e.g. allusers@innovaphone.com). This URI is used by the PBX to query presence information for all its PBX users.
3. Enter at the corresponding users under User/External UC the Long Name (e.g. External UC).
Configuration of ESTOS Procall 4.0
Open ESTOS UCServer administration and select under SIP/Federation the option Edge Server. Next click on configuration and insert the "External UC" Name (e.g. ext-uc), Password, IP Address (e.g. 192.168.0.1) and Port Number (e.g. 5060). In the dropdownlist Network select automatic and in Transport Protocol TCP.
Under SIP Server activate these option and add a new network interface with corrosponding IP Address (e.g. 192.168.0.20), Port Number (e.g. 5060) and Protocol (e.g. TCP).
Last there is a possibility to check the configuration. Click on Diagnosis and start the test.


