Howto13r3:Voice Note Voicemail XML Script
Summary
Some customers like to save voice notes and listen them using myApps/Voicemail app.
If you want to make a note and you don't have your hands free e.g. when driving a car, using an App like the ToDoList could be problematic or even dangerous. That's why an audio note is useful, you just speak the note. The notes can be recorded with any device and played back and deleted from anywhere.
With this new .XML, you can call an internal number, and save a Voice Note directly in myApps. You will be able, later, to listen to it and save it using the Voicemail app. Here is how.
Operation
To record a message, you call the service, hear a "beep" and record the note simply speaking. The length is limited to 50 seconds per note, to end the recording simply hang up.
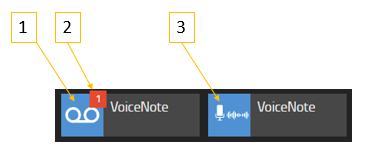
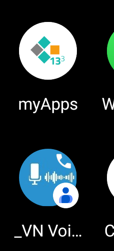
The service can either be called directly, e.g. with a function key on the phone or by saving the number as a favorite, or by pressing the recording voice note symbol (3) on the myApps homepage.
1 = App to play the Voice Note
2 = Badge Counter (in the example one new Voice Note stored)
3 = App to record the Voice Note
If a note is recorded, the batch counter increases for the corresponding VM app (2). Voice Notes are accessed in the same way as voicemail messages (1).
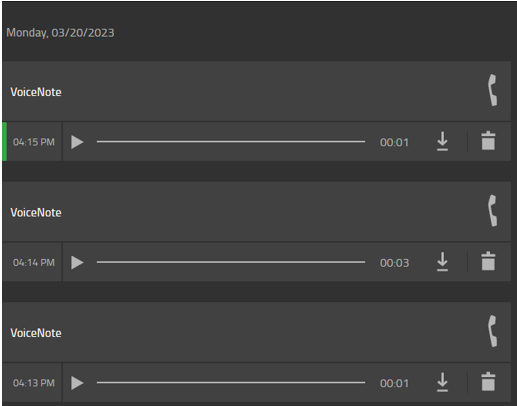
To listen to or delete the message use the VM App. Instead of the phone number, your name is shown in the number field, in our Example "VoiceNote" .
In the example there are 3 voice notes, the first one has not yet been listened to (green bar on the left).
The service does not require a license and can also be operated in parallel with a voicemail. In this case there are two icons on the home screen and the service can be recognized by the label.
External access, e.g. with DID, is not intended and is prevented by the system. Your notes are protected and can only be accessed via your myApps.
How it works
In fact, you call an XML script which plays a beep and then starts recording. The file is stored in a VM directory in VM format. This allows the regular VM app to access directly and also the batch conter will work automatically. The XML script itself can be called directly, but numbers outside the PBX are not accepted. The solution also includes an icon with which a link can be created directly on the homepage (3). This allows the service to be called directly.
Applies To
This information applies to
- All V13r3 PBX (and later) with App Platform.
System Requirements
The feature is based on an XML script typically provided by the Voicemail app. This version is supported from v13r3 and later.
Installation
Install and configure a second Voicemail app in your system: " https://wiki.innovaphone.com/index.php?title=Howto:V13_Create_a_second_Voicemail "
Open the PBX manager, your newly create Voicemail instance, open your new Voicemail app, and flag "custom"
Now connect to your Voicemail app files folder as described here " https://wiki.innovaphone.com/index.php?title=Howto:V13_Access_Voicemail_Files#Use_your_own_voicemail_files_with_the_voicemail-App_in_custom_mode " and upload the content of the Voice-Note-main.zip/Voice-Note-main/VoiceNote file in the custom folder (in the custom folder, only the .XML file and the beep.codec file must be pasted, vm_files fodler will be automatically created.
!!Be aware that you need to upload the files in the "custom" folder, and not the vm_files folder!!
Open the advanced configuration of your PBX (via the Devices app or directly via browser), and in PBX/Config/Objects, open your newly created Voicemail object.
Change, in the second tab, the URL, that now will point to VNote.xml instead of vm.xml, eg:
from: https://APdnsname/domain.tld/voicenote/custom/vm.xml?$app=on&$_pbxmwidir=vm_files
to: https://APdnsname/domain.tld/voicenote/custom/VNote.xml?$app=on&$_pbxmwidir=vm_files
be aware that URL is case sensitive, so please pay attention to that.
Also, voicenote is used in this example, but you need to configure the correct Voicemail instance name there (for example, in the previous image, the instance name was "voicenote")
Assign the new Voicemail object to the users you want to be able to use this feature. Doing so, they can see the badge count in myApps, listen and save the Voice Memo directly from the app.
Smartphone Integration (Android)
Here are some tips on how to better integrate Voice Notes into a smartphone.
Contact Entry and Icon
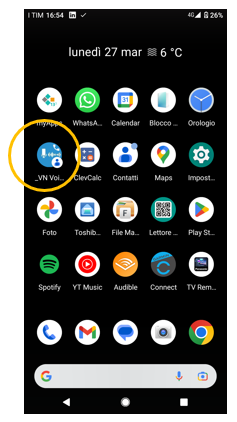
You create a contact and name it with a leading underscore, in the example _"VN". This entry appears at the top of the phone book. This is useful, for example, when searching in the smartphone telephone directory, your Note is always on top of the list.
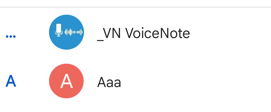
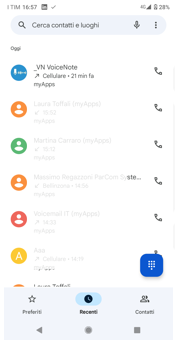 The icon is also displayed in the various call lists.
In the VoiceNote dowload provides also a icon named "Vnote.png". You can send yourself the icon as an attachment to an email, open mail on your Smartphone and download it locally. To assign the icon to the entry click on the picture of your Phonebook and select "Gallery" and "Download" where the icon is stored.
Assign to the favorites
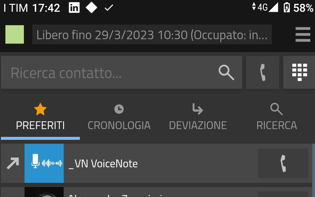
Open myApp, dial the phone number and mark it as a favorite (star). The icon is now displayed as an image.
Specify the softphone as the standard device for myApps and drag it into the autostart frame. You can now select the Voice Note by pressing a button.
Smartphone Home
You can also create a destination button on the smartphone home screen. To do this, choose a "free" position on the screen of your smartphone and press it longer. Depending on the Android version, a selection window or a menu at the bottom of the screen will open, select "Widget". A window will open and several apps will be displayed, scroll down to the "Phone book" entry. Three windows are displayed here, "Dial", "Contact" and "Message". Select "Dial" and hold your finger on that window, the Android home screen will now appear and you can position the destination key. When you release, the phone book opens automatically, assign the previously configured contact "_VN". You now have a direct dial button in the main Smartphone home screen.
If you press the button, the stored number will be dialed automatically.
Widget controll
If GSM is stored as the standard phone on the smartphone, the number is dialed into the GSM network and does not work. If this is your case, proceed as follows. You open the GSM phone, click on the 3 dots in the right top corner and select "Settings". Open the menu item "Account for calls". With a normal myApps installation, the GSM of your provider and myAPPS are displayed here. Open the item "Make call with" and select "myApps". Both, a call from the phone book and via the destination button, are now made with myApps.
Please note, however, that myApps must be started, otherwise it will take too long to set up the connection.
Known Problems
Access via the icon does not work with the browser, so only with Windows, MacOS, Android or iOS (recording dailing the number works always).
Download
- download the complete file package of scripts and files described in this article.
