Howto:Creating custom Certificates using a Windows Certificate Authority: Difference between revisions
(New page: ==Applies To== This information applies to * all innovaphone devices * Microsoft 2008R2 CA * Microsoft 2012R2 CA <!-- CA Clientzertifikat Microsoft Server Serverzertifikat Windows Zertif...) |
(No difference)
|
Revision as of 11:34, 27 March 2017
Applies To
This information applies to
- all innovaphone devices
- Microsoft 2008R2 CA
- Microsoft 2012R2 CA
More Information
Problem Details
To issue a certificate from a Microsoft CA for innovaphone devices which meets our requirements (client and server authentication), you must create a corresponding certificate template.
System Requirements
We need an Microsoft CA on Windows 2008R2 or Windows 2012R2. Windows 2016 is not tested yet.
Configuration
To do this, we open the certificate templates with the management console (mmc.exe) on our Microsoft CA and add the certificate templates snap-in. The two operating systems do not differ at this point.
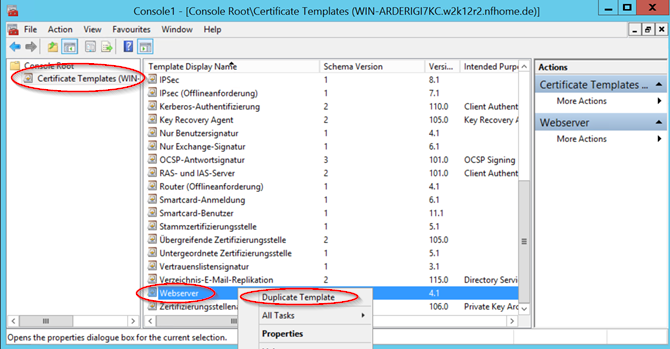
Here we look for an existing template on the basis of which we want to build a new template for our innovaphone devices (for example Webserver). With the right mouse button on this template, we can duplicate this template.
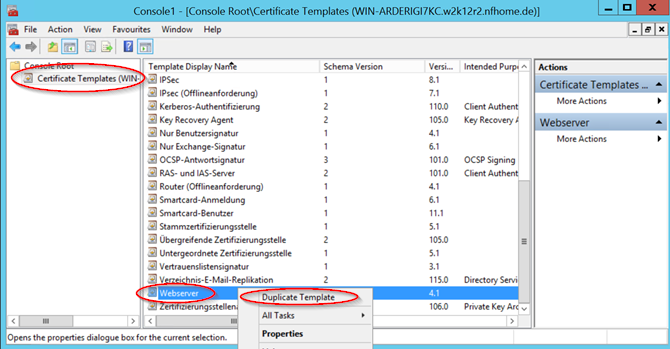
Now the corresponding settings of the certificate template can be carried out according to your own guidelines.
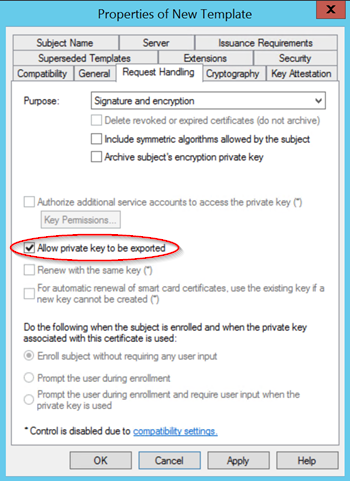
To create certificates without a request, the private key must be exportable. This is set in the Request Processing tab. This option is not necessary for certificates created via a signing request.
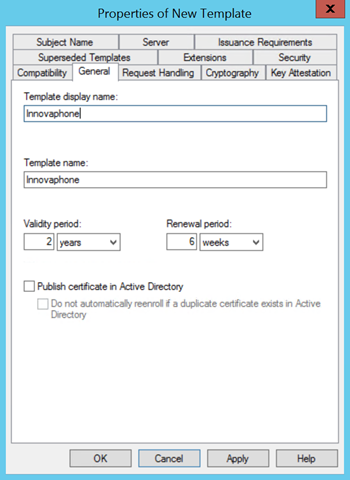
On the General tab, you can specify the name of the certificate template and set the validity period and the renewal period.
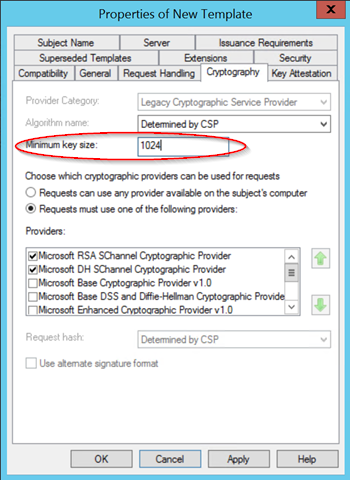
Under cryptography you can set the required key length. Currently, 2048 is used as default.
Innovaphone provides devices with a 1024 key. At this point you have to be careful that a too large key does not overload the CPU when using TLS.
Support:Be careful when using your own Device Certificate
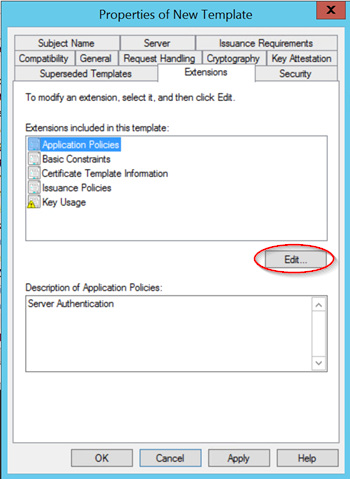
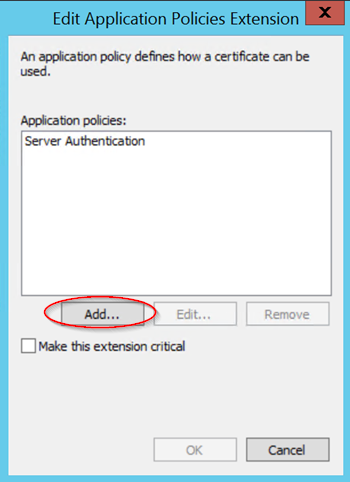
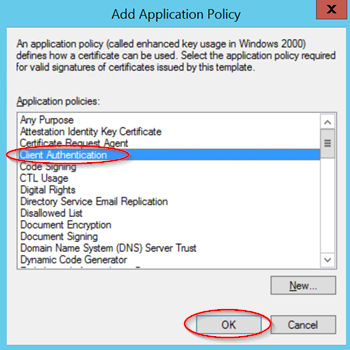
Under the Extensions tab, we need to add "client authentication" to the existing server authentication application.
Now we give still a previously created user, in my case a normal domain user "Inno-Cert", the right to read the created template and to send this certificate-based certificate issuing or renewal request. This allows us to give a dedicated user the right to manage only these certificate requests.
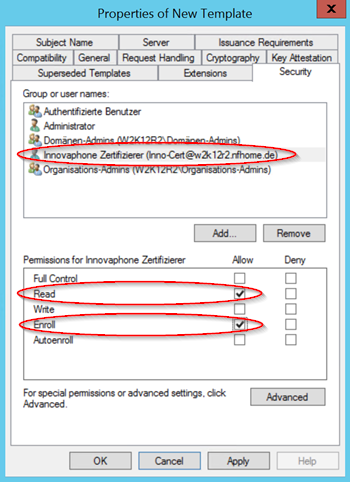
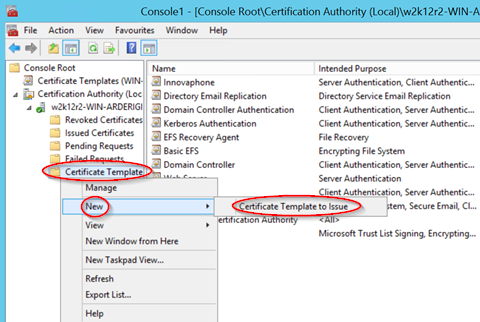
If all necessary settings have been carried out, this certificate template can be created with OK. However, in order to get this certificate template also displayed in the certification authority, you must activate this created template. To do this, right-click on the certificate templates in the certification authority and select "New" - "Certificate certificate to be issued".
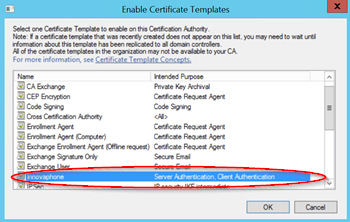
In the following window, you will find the created certificate template and confirm with OK.
Now, on the basis of the created certificate template, innovaphone can issue device certificates which can be authenticated to you and which as web server certificates enable secure access via HTTPS without error message.
Known Problems
Note on using strong certificate keys:
The innovaphone devices come with an RSA key with a length of 1024 bit and a SHA signature of 256 bit. This should be sufficient for a standard encryption of a UC system.
It is possible to use a stronger certificate for its UC system. However, one should take into account that a jump of 1024 bit to 2048 bit is about 6 times higher CPU utilization is needed. With a jump from 1024 bit to 4096 bit, it is even a 36 times higher CPU power needed. This must be taken into account when selecting the gateway with respect to the registered subscribers in connection with H323 / TLS registrations and other SSL applications of the gateway, e.g. CDRs, myPBX clients and logging.