Reference14r1:Concept Contact Widgets
Applies To
- innovaphone PBX from version 14r1
- innovaphone Application Platform
Requirements
- innovaphone PBX
- innovaphone Application Platform
- Firmware Version 14r1
- One Port License is used by the app service to establish a VoIP registration at the PBX
- Video License (optional) is required to establish video connections [*]
- Widget License (optional) is required to remove any 'innovaphone' branding from the Widget UI
[*] UC License can also be used since it includes a Video License
What is a Contact Widget?
A Contact Widget (or Website Widget) is an element that can be added to a website. It offers to website visitors a way to get in contact with agents (e.g. help-desk). Website visitors can start chat sessions (asking questions, getting answers) or can start voice or even video calls.
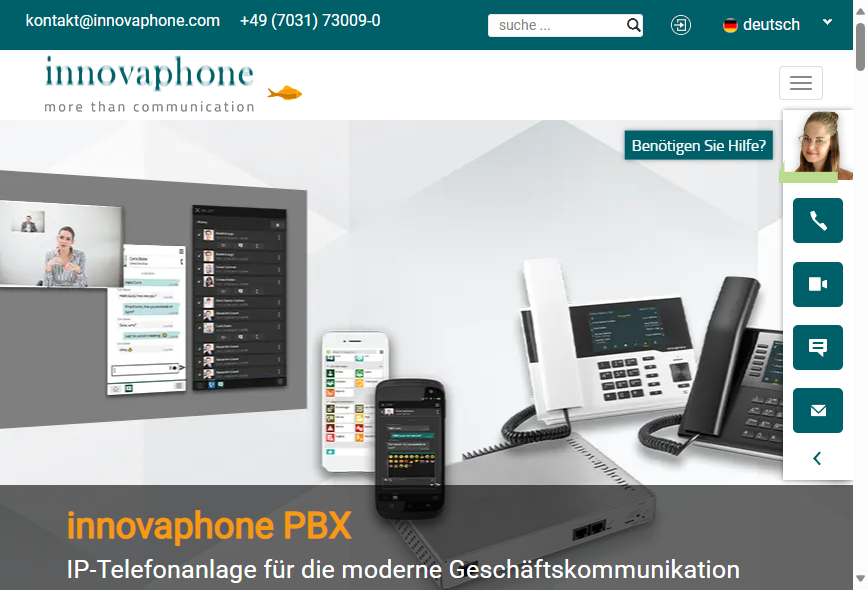
An nice example for a "Sidebar Widget" can be viewed here.
When you have opened this website the Sidebar Widget comes slowly into view on the right side.
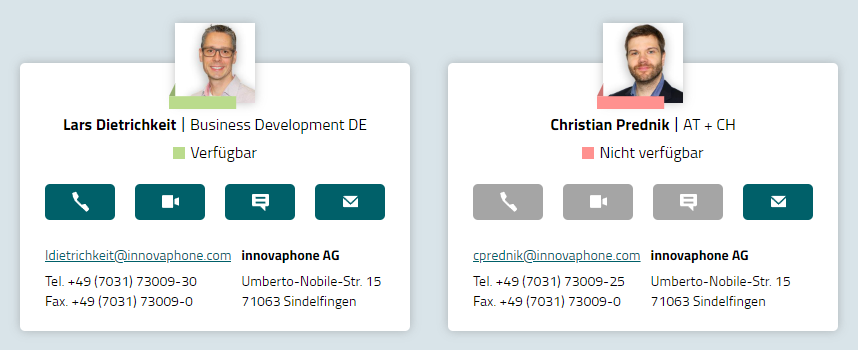
Example of a Business-Cards-Widget:
Example of a Sidebar-Widget:
Overview
The central part of the new Widgets-Concept is the Contact-Widgets-App. The Contact Widgets App is installed on the innovaphone Application Platform and it allows a PBX user to define Contact Widgets.
Contact Widgets can be integrated in a Website to offer easy ways to website users to contact Agents. Agents are PBX users meant to communicate with external clients.
There are 2 fundamental types of Contact Widgets:
- Sidebar Widgets
- Business Cards Widgets
A Sidebar Widget appears one side of the website trying to take as less space as possible. The website visitor can expand the Sidebar Widget if interested.
A Business Cards Widget appears as integrated part of the website content, offering one (or more) contacts in form of ordinary business cards.
Configuration
For non experienced technicians have a look at Howto14r1:Install_Contact_Widget_App#Installation and follow the installation steps mentioned in the how-to article.
Others:
- Download the 'Contact Widgets App' via App Store.
- Install the App on the App Platform Manager.
- Create an instance for the Widgets App on the Manager. We recommend to use no capital letters and no special characters (also not such as space).
- Create a new PBX Object with the PBX Manager Plugin. (*)
- Assign App to authorized (admin) users, which will be allowed to create/change/delete Contact Widgets.
Experts:
(*) You can also create the PBX Object manually:
- Create a new object of type "App".
- Give it a "Long Name" ("Contact Widgets") and a Name ("widgets") same as the instance-name.
- Give it a password, same as the instance password.
- On the "App" tab configure URL to App Service on App Platform ("http://<ipaddress-or-dnsname>/<instance-name>/innovaphone-widgets").
- Activate option "Websocket"
- Grant access to APIs: "PbxSignal" (mandatory), "Admin" (optional) and "PbxApi" (mandatory)
Using the Contact Widgets App
Click on one of the buttons (depending on what type of widget you want to create):
- [+ Add new sidebar widget]
- [+ Add new business cards widget]
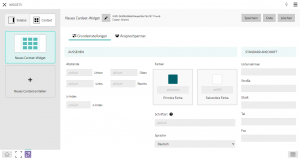
A new (empty) widget is displayed. You can give the widget a name by clicking the pen-symbol. The widget name helps to identify widgets as soon the number of widgets starts to grow.
You can expand and collaps widgets by clicking the header of each widget.
Creating a new Widget
New Widget features and options
- You can add the main contact details for this widget
- Select the default language
- Set your prefered font settings
- Change the colour settings
- Change the margin settings
- z-index
- Options Require license (when this checkbox is ticked, this widget will consume 1 license of type: Service(innovaphone-widgets) and the widget will be shown without advertisement)
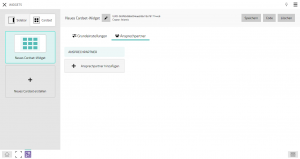
Adding Agent to Widget
You can add and remove Agents to a Widget. Agents can be contacted by external website visitors.
New agents are added by clicking the [+] button inside the agents container.
A dialog opens where you can define the agent. It all starts with the agent's 'SIP-ID'. That's the dialable PBX user address. You can use the search function to find a PBX user by name.
There are several (optional) attributes you can set for an agent, like 'Display name', 'Phone number', 'Email address' and 'Picture'. A picture can be placed by drag & drop or can be selected from local disk by clicking the placeholder rectangle.
Finally you can define the ways of communication the agent is available for:
- Voice-only calls
- Video calls (including voice)
- Chat
For a Business-Cards-Widget the order of agents could be relevant. You can change the order of agents in the Widgets-App by easy drag & drop using the mouse.
Each widget gets a unique ID (uuid) assigned on its initial creation. This uuid is used to identify the widget when it is integrated into a website.
In case of a sidebar widget, the agent's card will be displayed by default depending on its status(availability) unless you checked "Always show widget" under the sidebar settings.
In case of a business cards widget, the agent card will always be shown, but its availability is depending on its status.
The following settings are possible:
- Presence*: Display/availability of the card based on the presence status of the agent. Presence available (green), Presence unavailable, busy (red). Usage: Normal agent based on availability.
- Always online: Permanent display/availability of the card regardless of its presence or busy status. Usage: Multiple consecutive calls to the same destination, an agent with multiple line configuration, a group or waiting queue.
- Boolean*: Display of the card depending on the true status of a Boolean object. Usage: Agent, group or waiting queues based on boolean settings.
- Inactive: Agent card is permanently in the status unavailable (red). Usage: Showing the agent in a business cards widget, but limit the access to the agent for a longer period. (holiday, sick-leave or other reasons)
(* Important: Presence and boolean status are dependent on the visibility configured on all the monitored objects, eg. agent user objects and monitored boolean objects. The boolean object must have the visibility option "calls" checked before adding the boolean to the widget)
Integrating Widgets into Website
Now it is the website admin's turn to integrate the widget into the website.
To do this, click the [Code] button in the Widgets App at that widget you want to include. A popup appears showing a handful of code lines (HTML and Javascript).
You can copy the code lines into clipboard by clicking the [Copy] button.
You can paste the code lines from clipboard into your website code.
There's also a [Download] button. When clicking this button a small HTML file is saved on your local computer. This HTML file can be opened in a browser to preview the widget and test the widget's functionality.
Content-Security-Policy
If the website uses Content-Security-Policy (CSP) it could be necessary to add entries to config sections 'default-src' and 'img-src'.
- The Widget opens a secure websocket connection (wss:)
- The Widget loads images via Data-URL (data:).
- The Widget uses Mail-Links (mailto:).
- The Widget uses Tel-Links (tel:).
 <meta
   http-equiv="Content-Security-Policy" content="
     default-src 'self' wss://*.innovaphone.com; child-src 'self' mailto: tel:; img-src data:"
 />
After Integration
Once your widget is live on the website you can still change and update the widget in the Widgets-App. You can update the list of agents or change any other attribute. As soon as you click the widget's [Save] button any open widget instance in a web browser will update immmediately. No need for the website administrator to update the code.
Widget-API — Protocol between Website Widget and App Service
Basically, this section does not matter. To create and use widgets, knowledge about the protocol is not required.
All who are interested in technical details are welcome to read on.
Loading the Widget
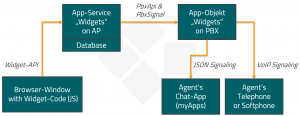
When a widget is loaded in the browser window of the website visitor, a websocket connection is opened to the app service on the innovaphone Application Platform. Once the websocket connection is established it goes like this:
[1] {"mt":"Start","uuid":"fadc5da4cae94bfc9434d9957ea08ccb"}
[2] {"mt":"Session","name":"Visitenkarten","lang":"de","strings":{...}}
[3] {"mt":"Info","id":"atlantis","dn":"Atlantis","department":"","phonenumber":"","email":"","company":{},"presence":"online","media":["voice","video","email","chat"],"order":0}
[4] {"mt":"GetPicture","id":"atlantis"}
[5] {"mt":"Info","id":"columbia","dn":"Columbia","department":"","phonenumber":"","email":"","company":{},"presence":"offline","media":["voice","video","email","chat"],"order":1}
[6] {"mt":"GetPicture","id":"columbia"}
[7] {"mt":"IceConfig","stun":"stun.innovaphone.com","turn":"turn.innovaphone.com"}
[8] {"mt":"Picture","id":"atlantis","url":"data:image/jpeg;base64..."}
[9] {"mt":"Picture","id":"columbia","url":"data:image/jpeg;base64..."}
[10] {"mt":"Info","id":"atlantis","dn":"Atlantis","department":"","phonenumber":"","email":"","company":{},"presence":"offline","media":["voice","video","email","chat"],"order":0}
[11] {"mt":"Info","id":"atlantis","dn":"Atlantis","department":"","phonenumber":"","email":"","company":{},"presence":"online","media":["voice","video","email","chat"],"order":0}
[1] The "Start" request is sent with the unique id of the widget.
[2] The app service sends the "Session" response providing the widget's display-name and other parameters.
[3]-[6] The app service sends "Info" messages for all configured agents. Each "Info" message triggers a "GetPicture" request to get a picture of the agent.
[7] The app service sends "IceConfig" providing the STUN and TURN config required for media calls.
[8]-[9] The app service sends "Picture" messages for all agents.
[10]-[11] The presence of an agent may change over time. Presence updates are provided with "Info" messages.
Initiating a call
[1] {"mt":"CreateCall","dest":"atlantis","dn":"Mein Name"}
[2] {"mt":"Channels","cmd":"PROPOSAL","sdp":"..."}
[3] {"mt":"CallInfo","state":"alerting"}
[4] {"mt":"CallInfo","state":"connected","cmd":"SELECT","sdp":"..."}
[5] {"mt":"ClearCall"}
[6] {"mt":"CallInfo","state":"terminated"}
[1] "CreatCall" message sets the target of the call ('dest') and the own display name ('dn').
[2] "Channels" message provides the media offer for this call. Complete SDP offer is provided.
[3] "CallInfo" is received giving information about the call's current state.
[4] Next "CallInfo" is received telling the call was answered and deliviering the remote side's media answer.
[5] Web site user terminates the call.
[6] The final "CallInfo" message is received.
Troubleshooting
If an issue can be reproduced
*Web visitor in a browser.
The myApps web uses the logging facilities provided by the browser it runs in (i.e. JavaScript function console.log). In most browser this is available as Console after pressing F12.
*The called agent working with myApps client.
The myApps platform services provide more elaborate tracing mechanisms. See Troubleshooting in Concept myApps platform services.
*Troubleshooting AP Services on the AP.
Troubleshooting a specific App instance on the AP Course13:IT_Plus_-_Tools_for_Troubleshooting#App_Service_Logs
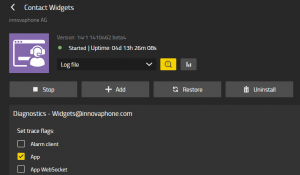
Go to the AP Manager and select the App instance from the Contact Widgets App. Click on Diagnose and make sure that the box App is ticked.
Make sure that the logging of the App instance has been activated.
