Howto13r3:Setting up the Calendar App with OAuth2 and app-only authentication
How-to setup the Calendar for OAuth2 with app only authentication
Starting with 13r3 sr17 and 14r1 sr3, the Calendar can be setup to use app only authentication in Exchange Online. So no user with application impersonation is used anymore. This guide shows you how to set it up inside the Azure portal as well as howto configure the calendar. Please note, that this is not a complete administration guide. Instead, it is a simply step-by-step tutorial which should work but maybe not the most accurate administration of your Azure AD – it’s just the way how we managed to use it. It is highly recommended to ask your Azure Administrator for details and / or read the Microsoft documentation.
Note: The screenshot and labels may change because of updates done by Microsoft. The following steps had been made with the version with the Azure portal from June 2024. Note also that the images are scaled. If you need a sharper image, just click on it to see it in full size
Registering the Calendar app for the Azure Microsoft Entra ID
Open the Azure Microsoft Entra ID
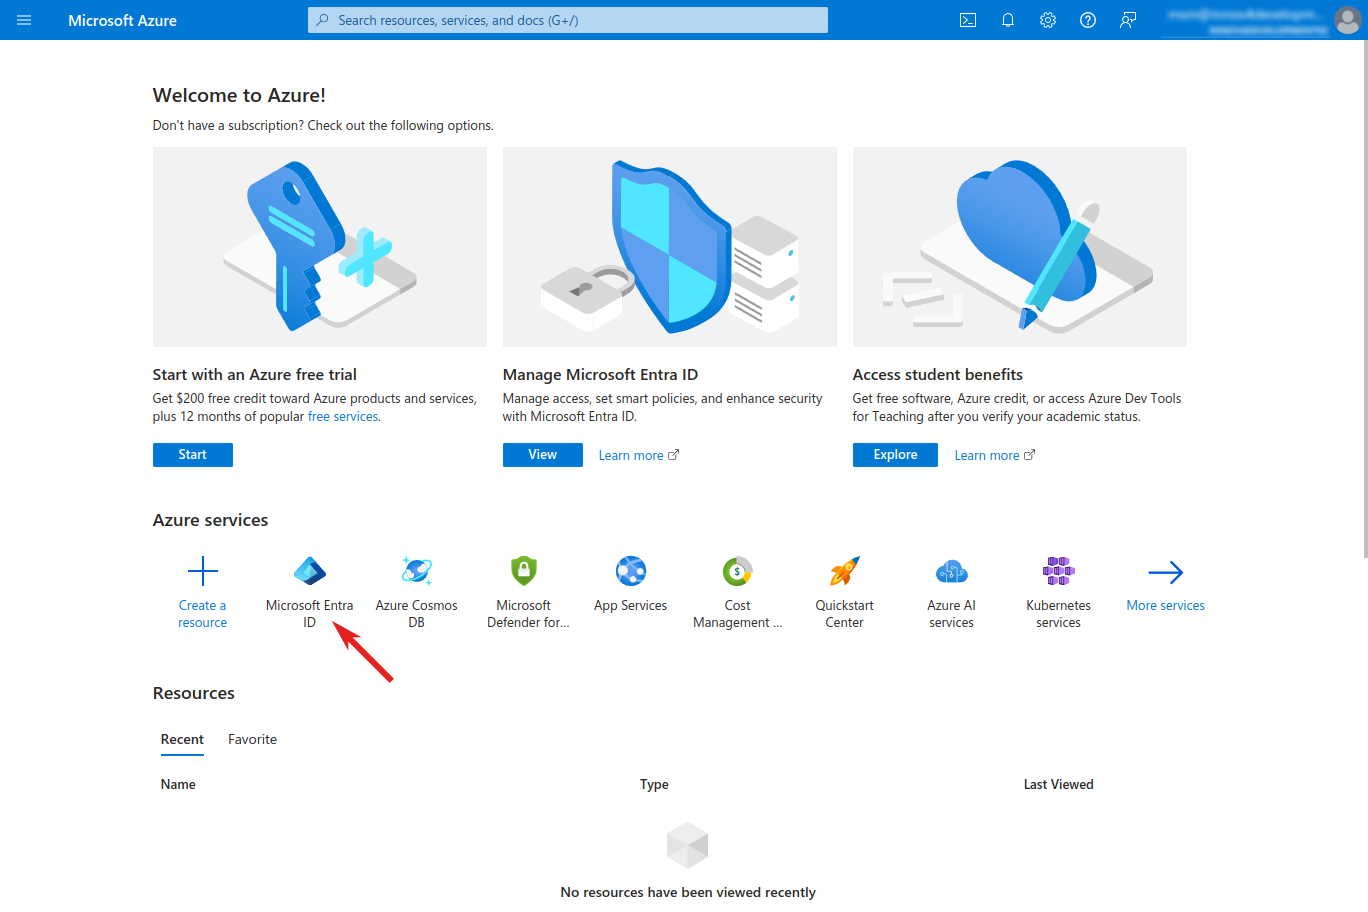
- Go to the Azure Portal homepage and sign in with your admin user
- At "Azure services" click on "Microsoft Entra ID"
Create a new App registration
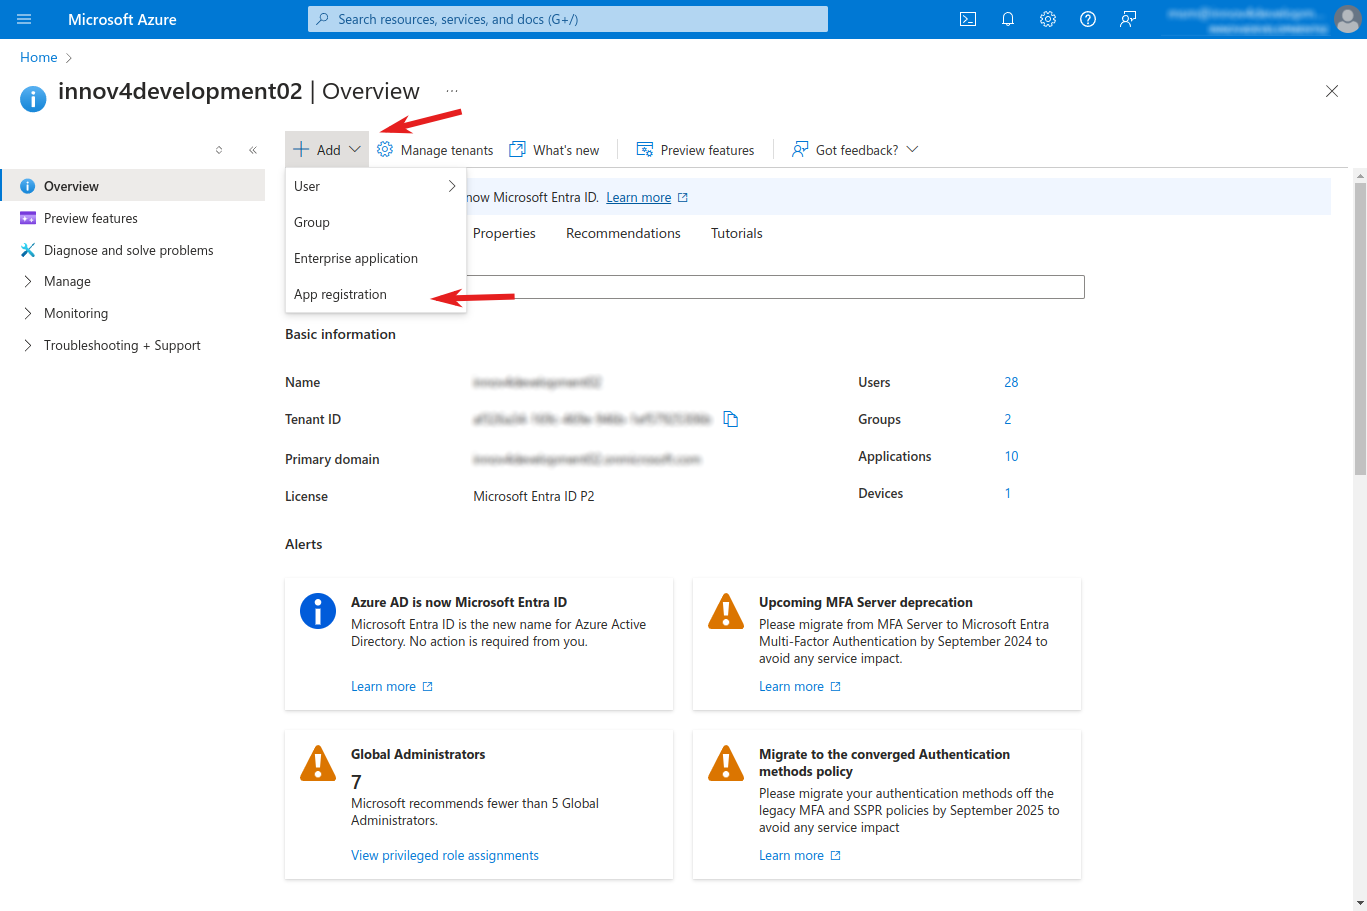
- Click on "+ Add" and select "App registration"
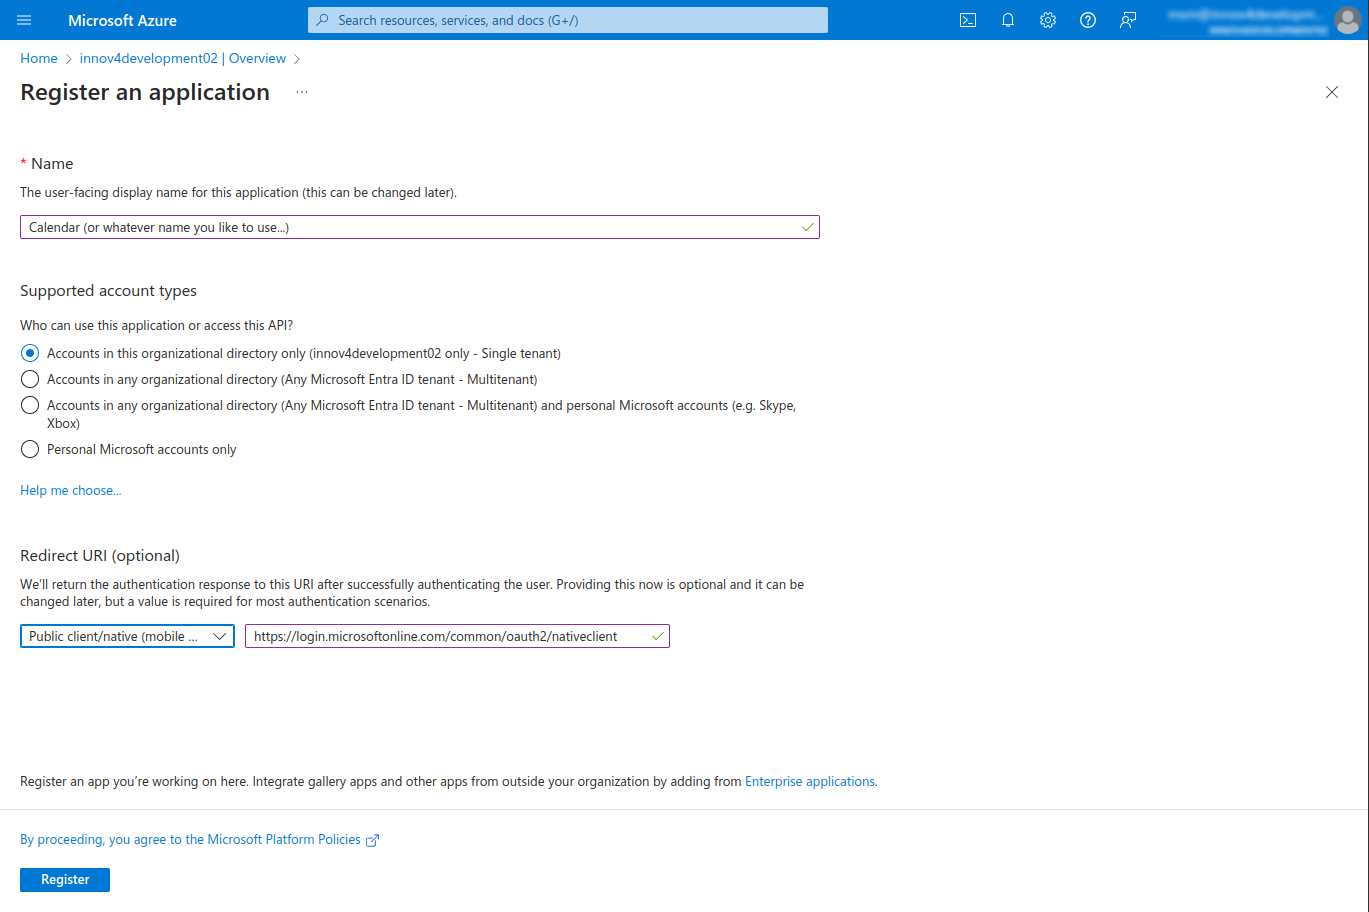
- Insert a name for the app and define whether you need single- or multi-tenant access.
- For the Redirect URI select "Public client/native (mobile & desktop)" and use the predefined URL "https://login.microsoftonline.com/common/oauth2/nativeclient"
- Finalize this step by clicking on "Register"
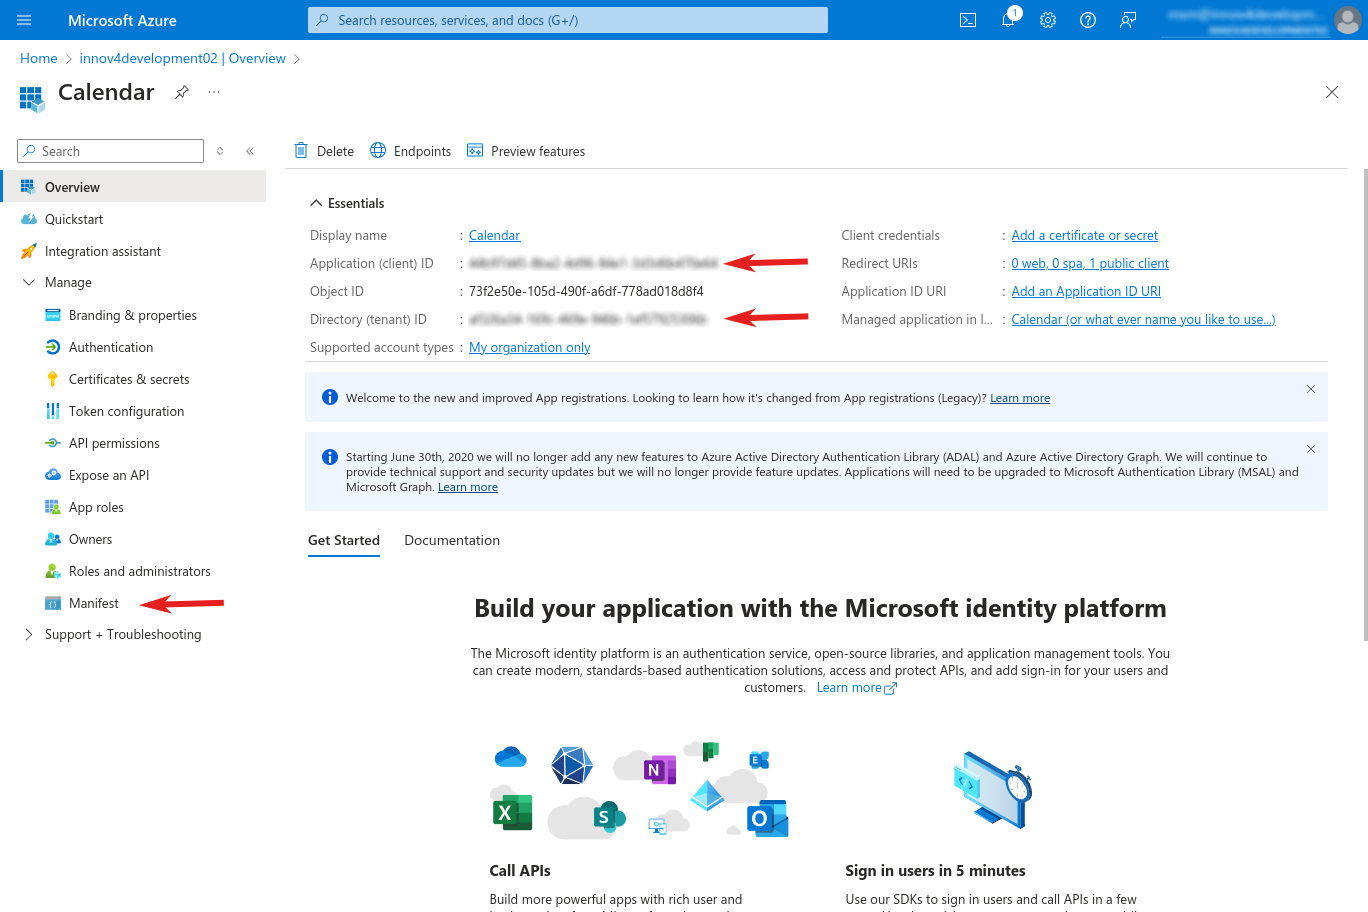
- When the overview page is shown (if not, click on Overview on the sidebar), copy the following IDs and temporarily put them into a document (the need to be added to the Calendar config later):
- Application (client) ID
- Directory (tenant) ID
- After that, open the section "Overview - Manage" and click on "Manifest"
Configure the permissions
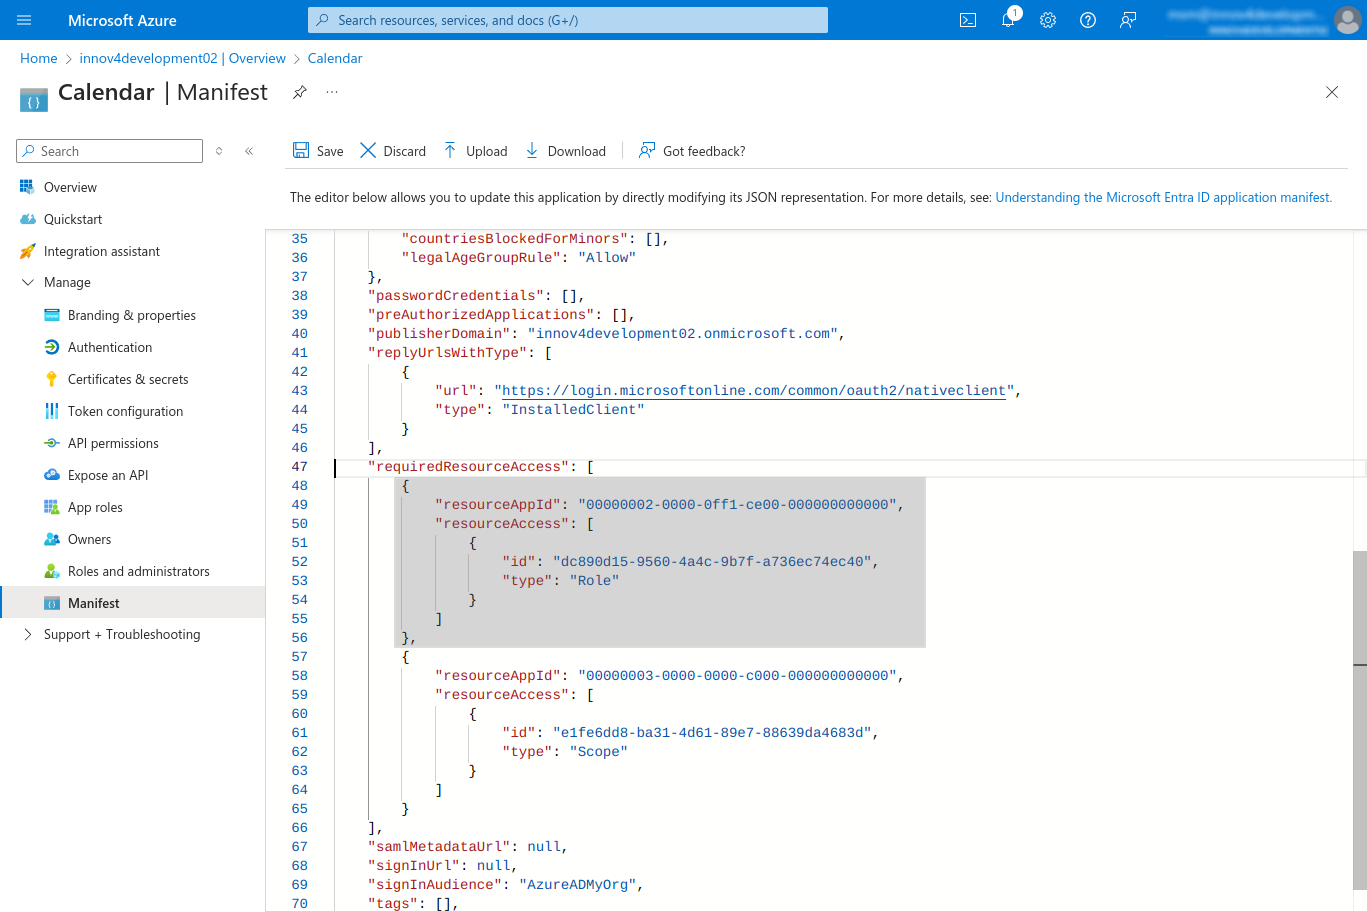
- Add the following json part to the manifest after "requiredREsourceAccess" (see highlighted passage in the screenshot):
   {
       "resourceAppId": "00000002-0000-0ff1-ce00-000000000000",
       "resourceAccess": [
           {
               "id": "dc890d15-9560-4a4c-9b7f-a736ec74ec40",
               "type": "Role"
           }
       ]
   },
- Save the changes (if you can't click save, you probably have an error in the json syntax)
- When done, click on "API permissions" on the sidebar (still inside the "Overview - Manage" menu of your registered app).
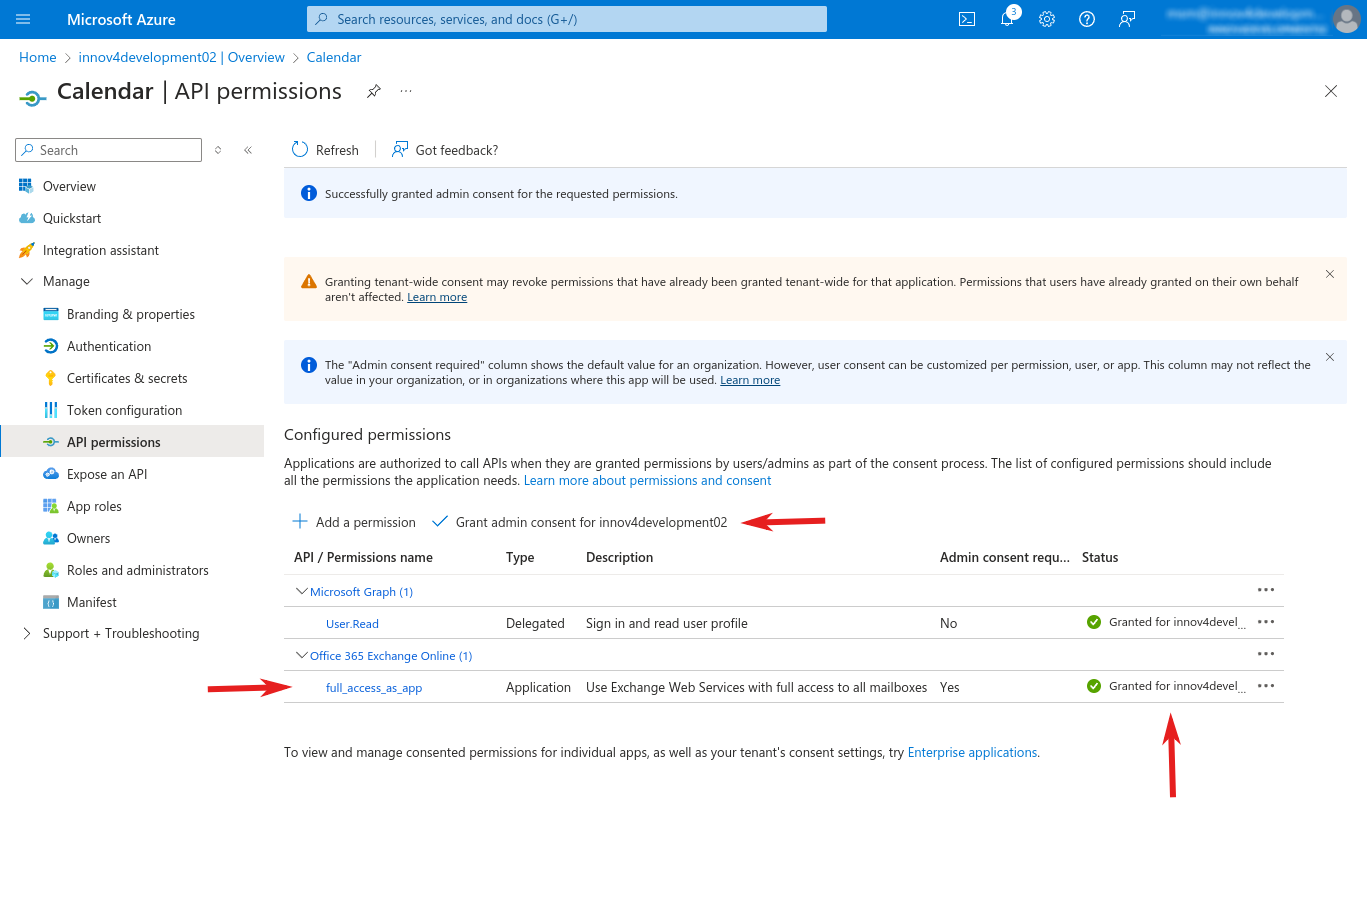
- Under "Configured permissions - API / Permissions name" you should find the entry "Office 365 Exchange Online - full_access_as_app". You now need to grant admin consent for that permission by just clicking on "Grant admin consent...".
- Make sure that every permission has the green mark and "Granted for..." entry as status (see screenshot).
Create a Client Secret
- Under "Overview - Manage" click on "Certificates & secrets"
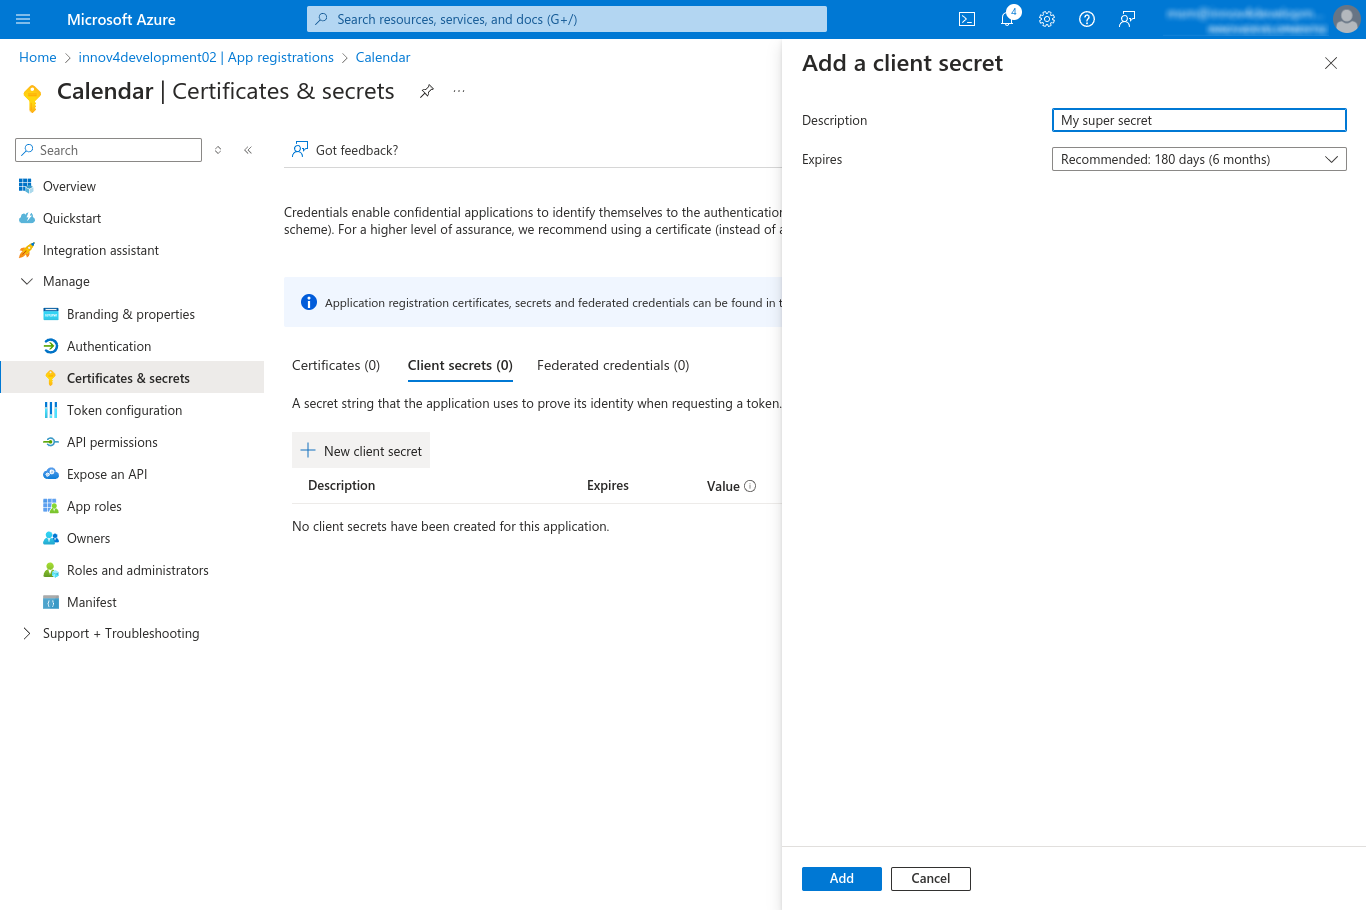
- Create a new secret by clicking on "+ New client secret"
- Set whatever description you like to use for the new client secret
- Define when the client secret will expire as defined by the policy of your company. Note that after the secret expires, the Calendar can't sync with Exchange anymore until you create a new secret and set the value (see below) in the Calendar configuration.
- Click "Add" to create the client secret
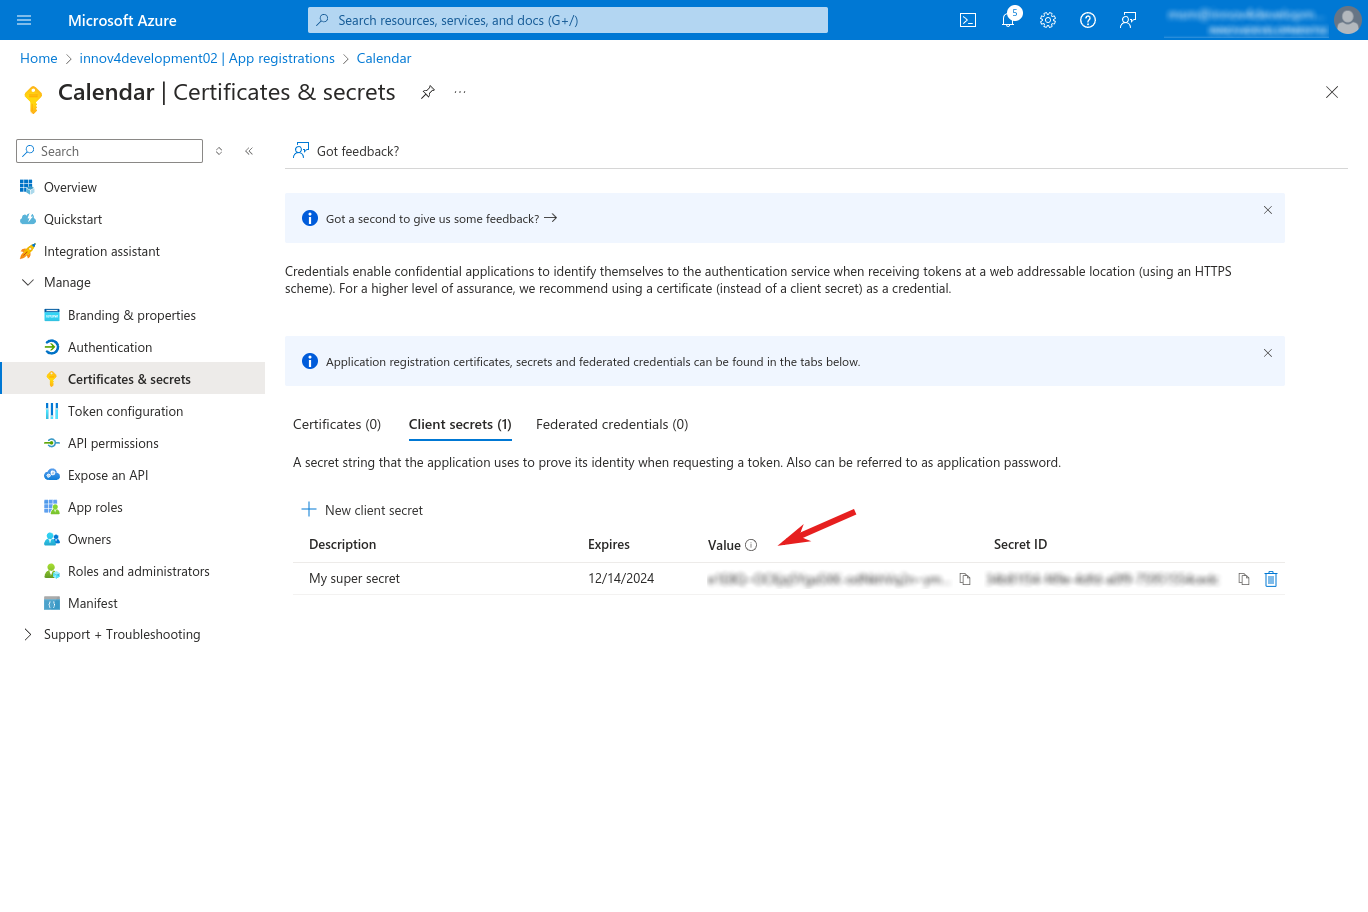
- Copy the value of the added client secret (see screenshot). Note that later you may not have access to the value since it will be obfuscated / hidden by Azure. This value must be given to the Calendar configuration.
Setting up the Calendar configuration on the App Platform
- Open the PBX Manager in myApps, click on Calendar and then on "Configure". (NOTE: If you have an already existing Exchange sync configuration, you must first set the Type of sync to disabled and save the change. Open the configuration again to continue.)
- Set the fields like shown in the table below
- Click on "Ok" to save the configuration.
- The Calendar is now communicating with Exchange Online using App Only Authentication.
| Field | Value |
| Sync-Type: | Cloud (Exchange Online, App-Only Authentication) |
| User: | Any email address that exists. This user doesn't need to have special rights. The address will just be used to get the configuration of Exchange and to start the communication with the server. However, it must be a valid email address with a configured mailbox. |
| Autodiscover URL: | Leave it empty, use https://autodiscover-s.outlook.com or the address of your autodiscover server. |
| Exchange server to be used: | Either external or internal, depending on your configuration. However, external should be fine for most Exchange 365 installations. |
| Client ID: | The Application (client) ID from your Entra ID app registration from the configuration step above. |
| Tenant ID: | The Directory (tenant) ID from your Entra ID app registration from the configuration step above. |
| Supported account: | “My organization only” (if you configured single tenant) or “Multiple organization” (if you configured multi tenant). |
| Client Secret: | The value of the client secret you from your application registration (see above). |
| Max subscriptions per connection: | As long as there is no need leave it to the default of 200. |
| EWS protocol debugging | Only enable it for trouble shooting. |
Troubleshooting
Authenticating error with Autodiscover
If you run into authentication problems with the Autodiscover server, it can be that the default security settings are enabled for your Active Directory (which probably will be the case for new Exchange Online Setups). In that case, configure the security settings to allow access to the Autodiscover server or disable the default security settings, like described here:
Finding an alternative Autodiscover server
You can also try to find an alternative Autodiscover server by using the Microsoft Autodiscover V2 API. To do so, just enter the following URL to your browser (replacing the email address placeholder first): https://outlook.office365.com/autodiscover/autodiscover.json/v1.0/<Email-Address-Of-An-Exchange-User>?Protocol=AutodiscoverV1
If the user has the email address myuser@mycompany.com, the URL will be: https://outlook.office365.com/autodiscover/autodiscover.json/v1.0/myuser@mycompany.com?Protocol=AutodiscoverV1
You should receive a simple text message that may be similar to the following:
"Protocol":"AutodiscoverV1","Url":"https://outlook.office365.com/autodiscover/autodiscover.xml"}
Your Autodiscover server will be the part from https to the first /autodiscover part (in this example https://outlook.office365.com)
